Oyster Mushrooms @ Home
TL;DR For posterity, they grow on cardboard 📦🍄😬
- make bulk LCs from store bought spore or LC syringes in sterilized jars
- make spawn substrate in sterilized bags from LCs
- fruit in cold water lime pasteurized substrate using fully colonized spawn
This is my second attempt at growing. The first one using logs wasn't particularly successful as the logs quickly dried out.
I wanted to create a little circular economy, since (a) cardboard; and (b) coffee grinds are the things we mostly recycle/compost in our household anyway. So it makes sense to do something with those, which also produces food in the process. Luckily, oyster mushrooms decompose wood, so they will grow on anything containing cellulose.
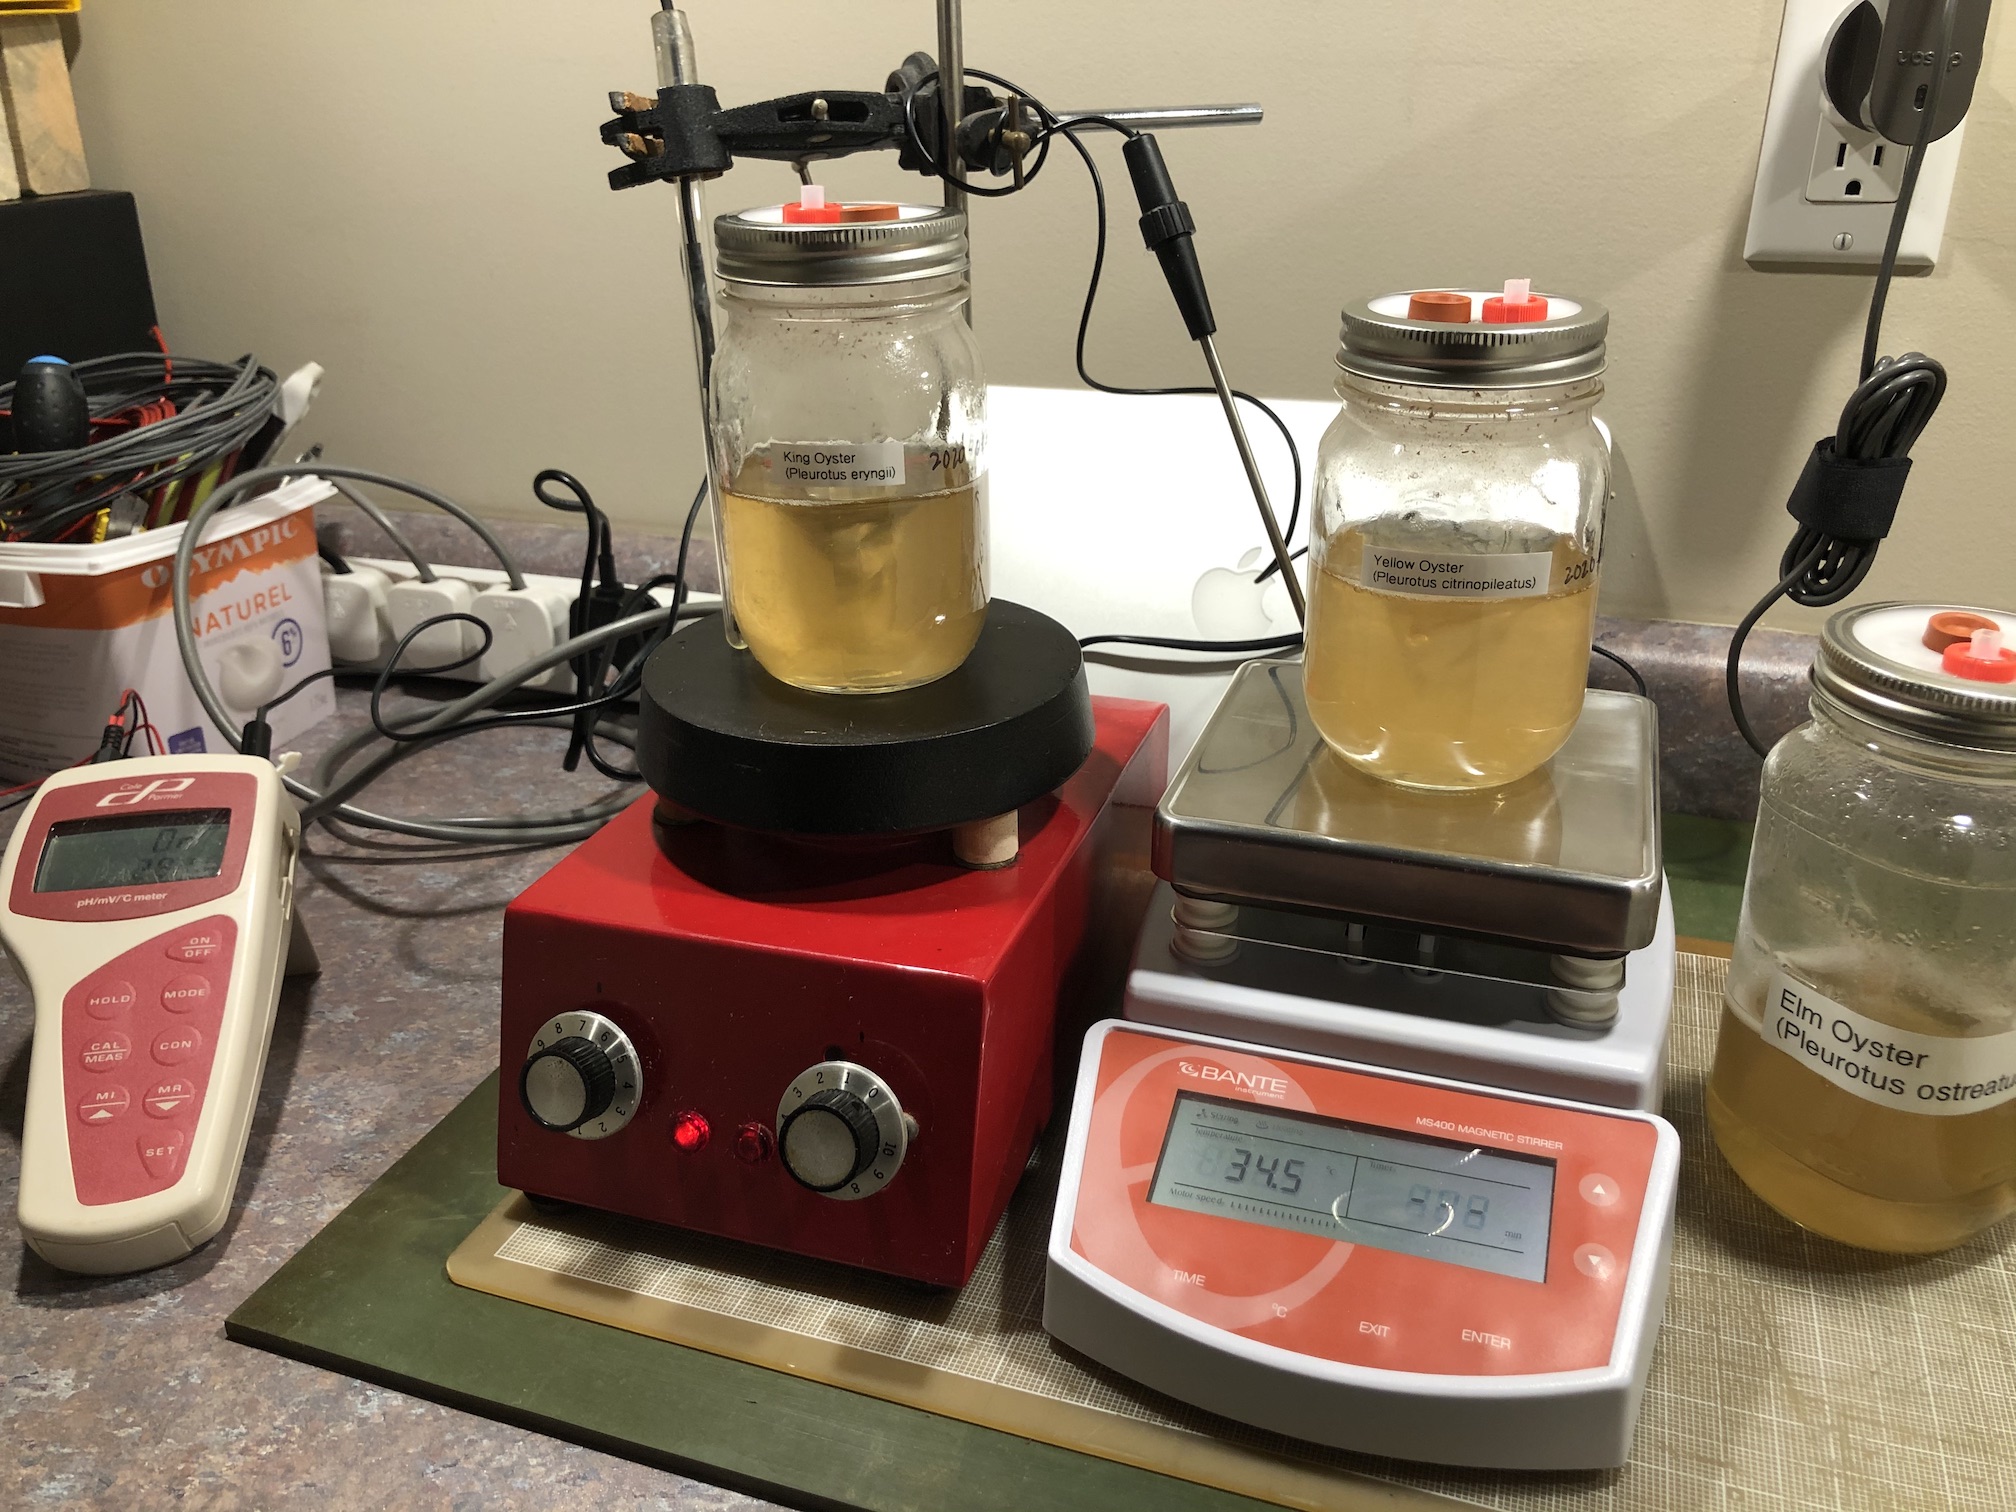
This time around I bought syringes with liquid cultures of Elm, Yellow and King Oyster mushrooms from growmushroomscanada.ca. I also bought some filter patch bags, Tattler plastic mason jar lids, injection ports (rubber plasma vial cap) and syringing filters to build sterile jars. I also got a 1" magnetic stir bar for each jar, so the LCs could be aerated on demand. these cultures can be stored in the fridge and used to inoculate lots of spawn bags.
After a few weeks, about 10-20ml of LCs were syringed out into PC sterilized mixed spent coffee grinds, straw, PureeMaker shredded cardboard and a hand full of hardwood pellets (later probably unnecessary) in filter patch bags. Note, the substrate needs more than 15 minutes in the pressure cooker (at least 60 minutes, but 90 minutes is safer); my first attempt failed because of contamination. To add an injection to a standard filter patch bag, just clear tape a soft rubber "computer foot" to the side of the bag and inject through that. It works just fine and is cheaper than buying bags with the injection port.
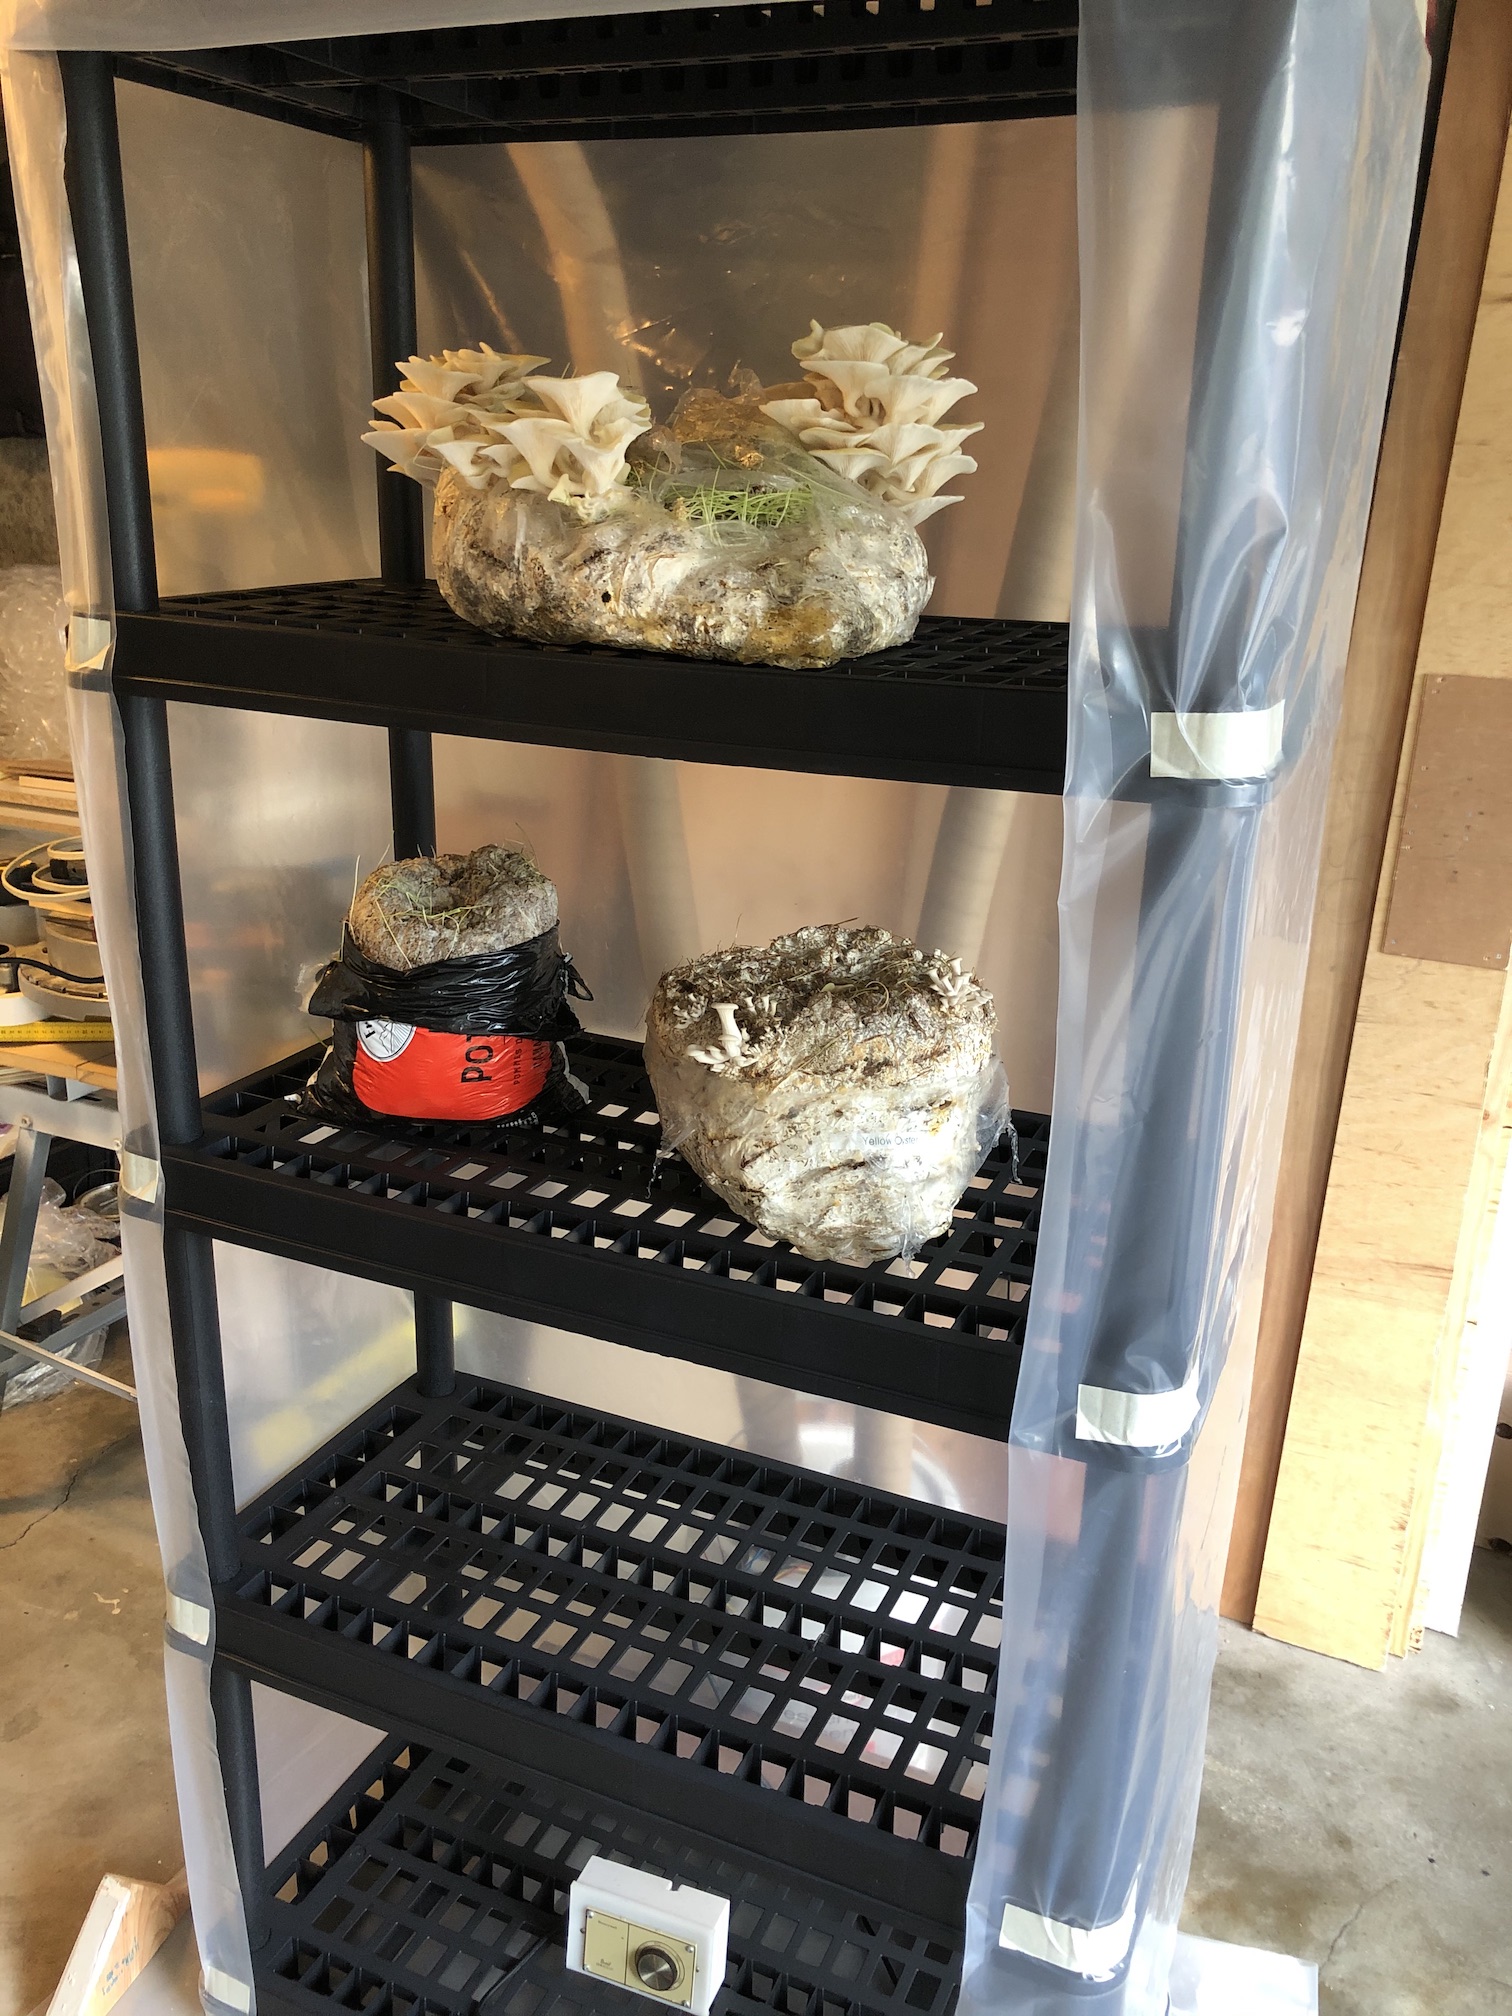
After another few weeks, the bags fully colonized and were mixed into the same cold-water-lime pasteurized bulk substrate mix (coffee, straw, cardboard, pellets and some garden vermiculite additive). To pasteurize, add 6g of Calcium Hydroxide to one gallon of tap water. I use five gallon buckets to do this. mix everything in the bucket, leave for 24 hours, then drain/squeeze the liquid out to field capacity (look it up).
I used some old poly bags with slits slashed all over the bags, but buckets, garden pots, etc. will also work just fine, as long as there are some holes pre-drilled.
The fruiting chamber was basically a plastic shelving unit from Home Depot, wrapped in some construction/renovation poly film from the same place with double-sided tape holding it all together.
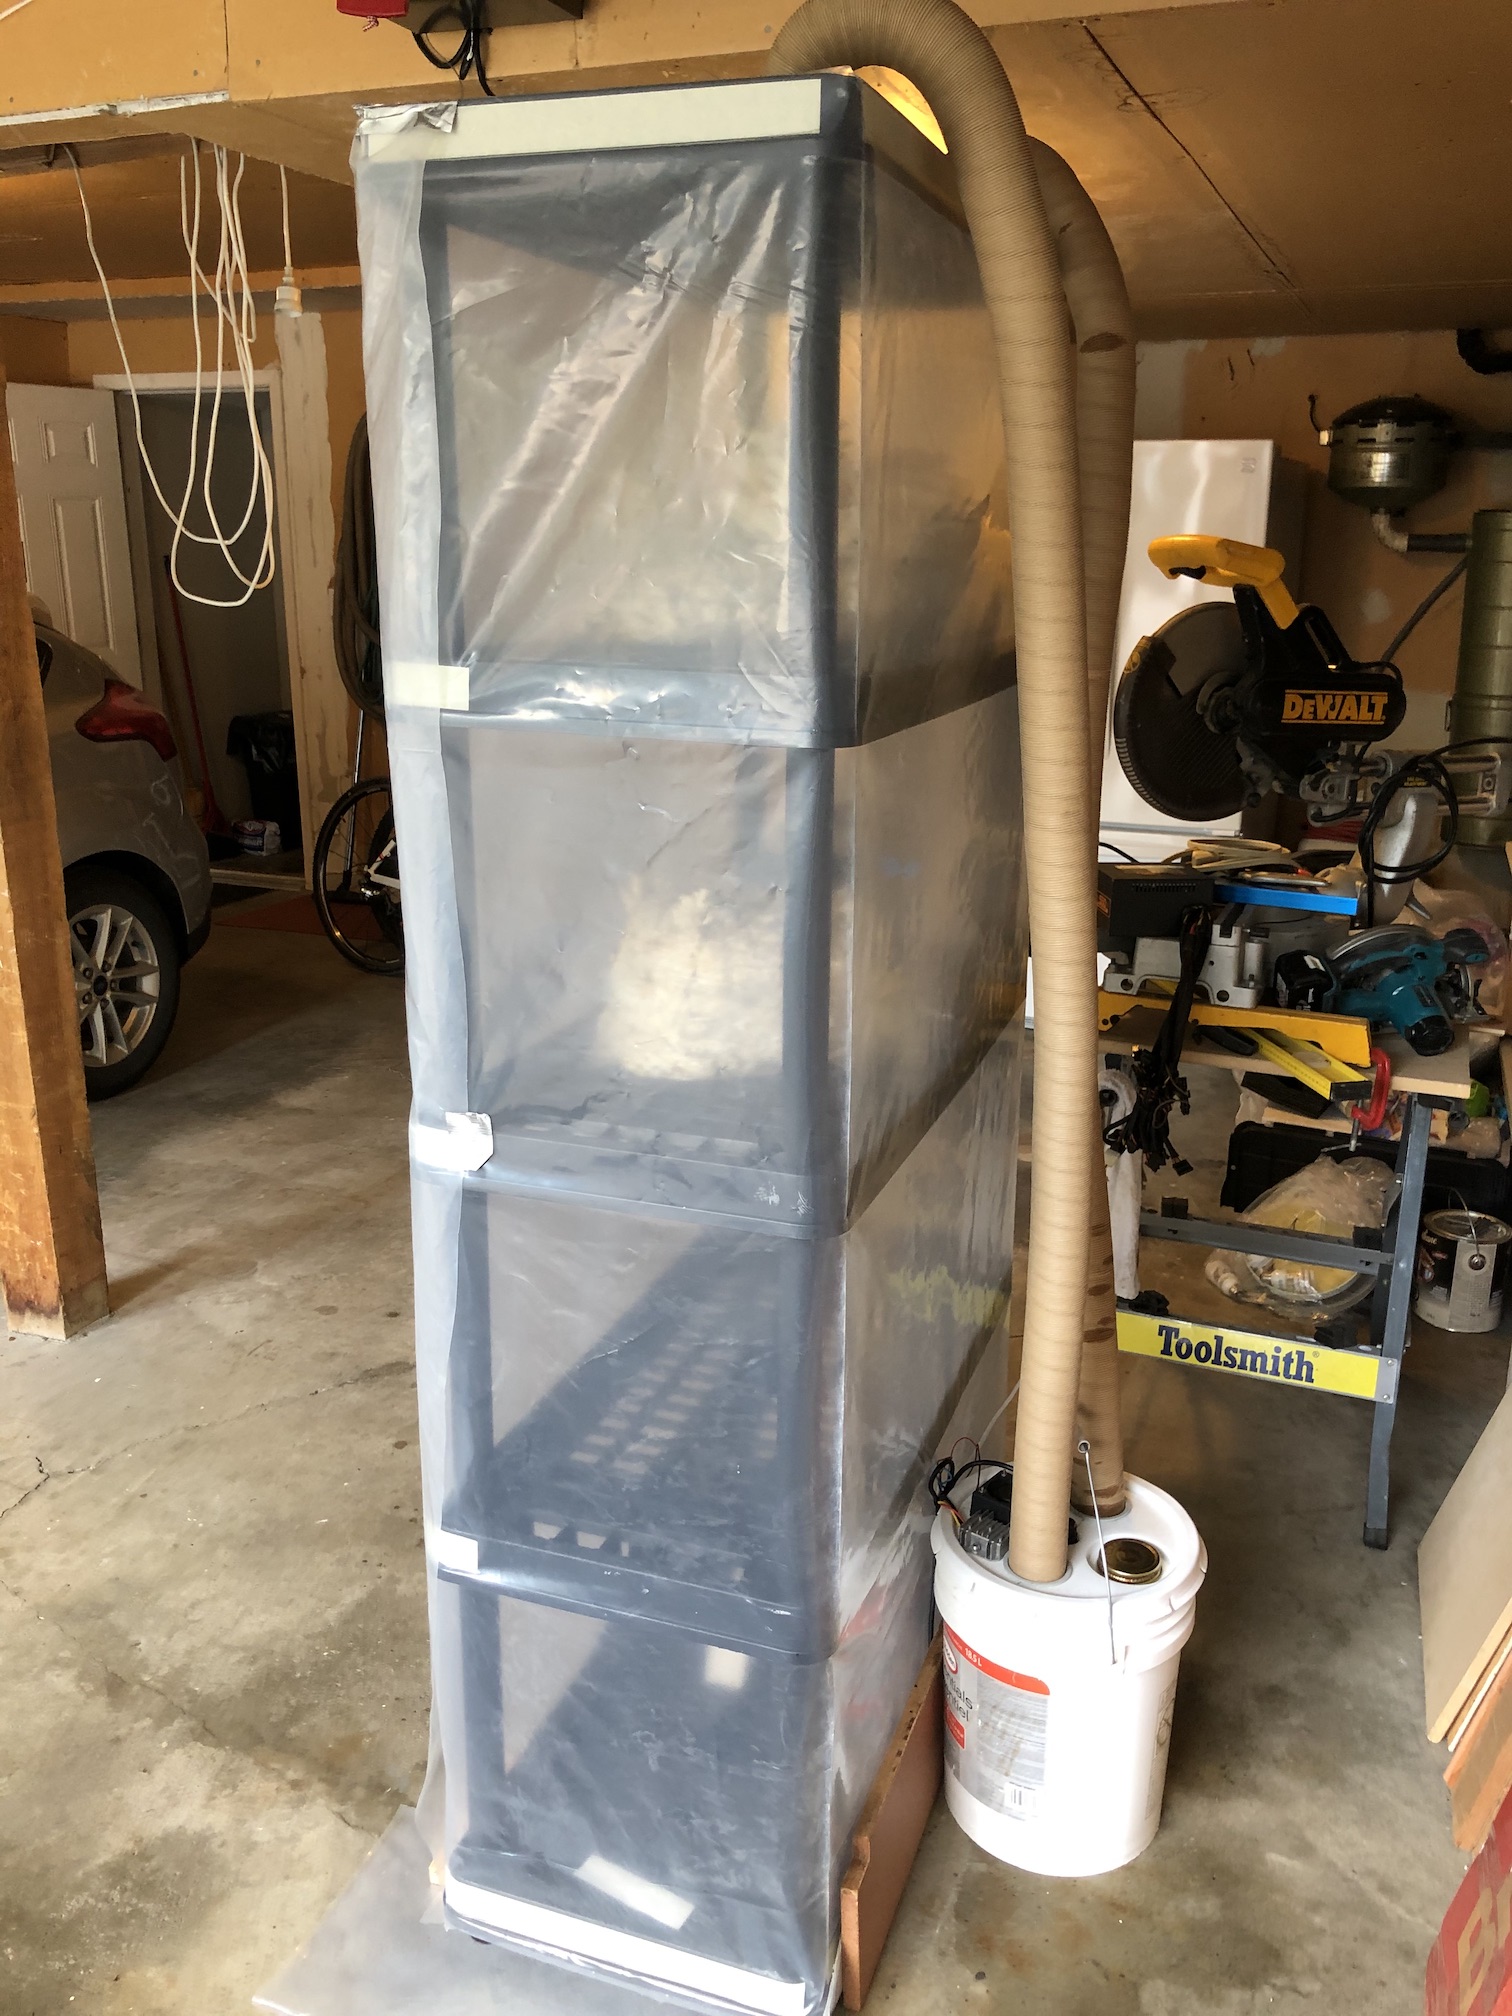
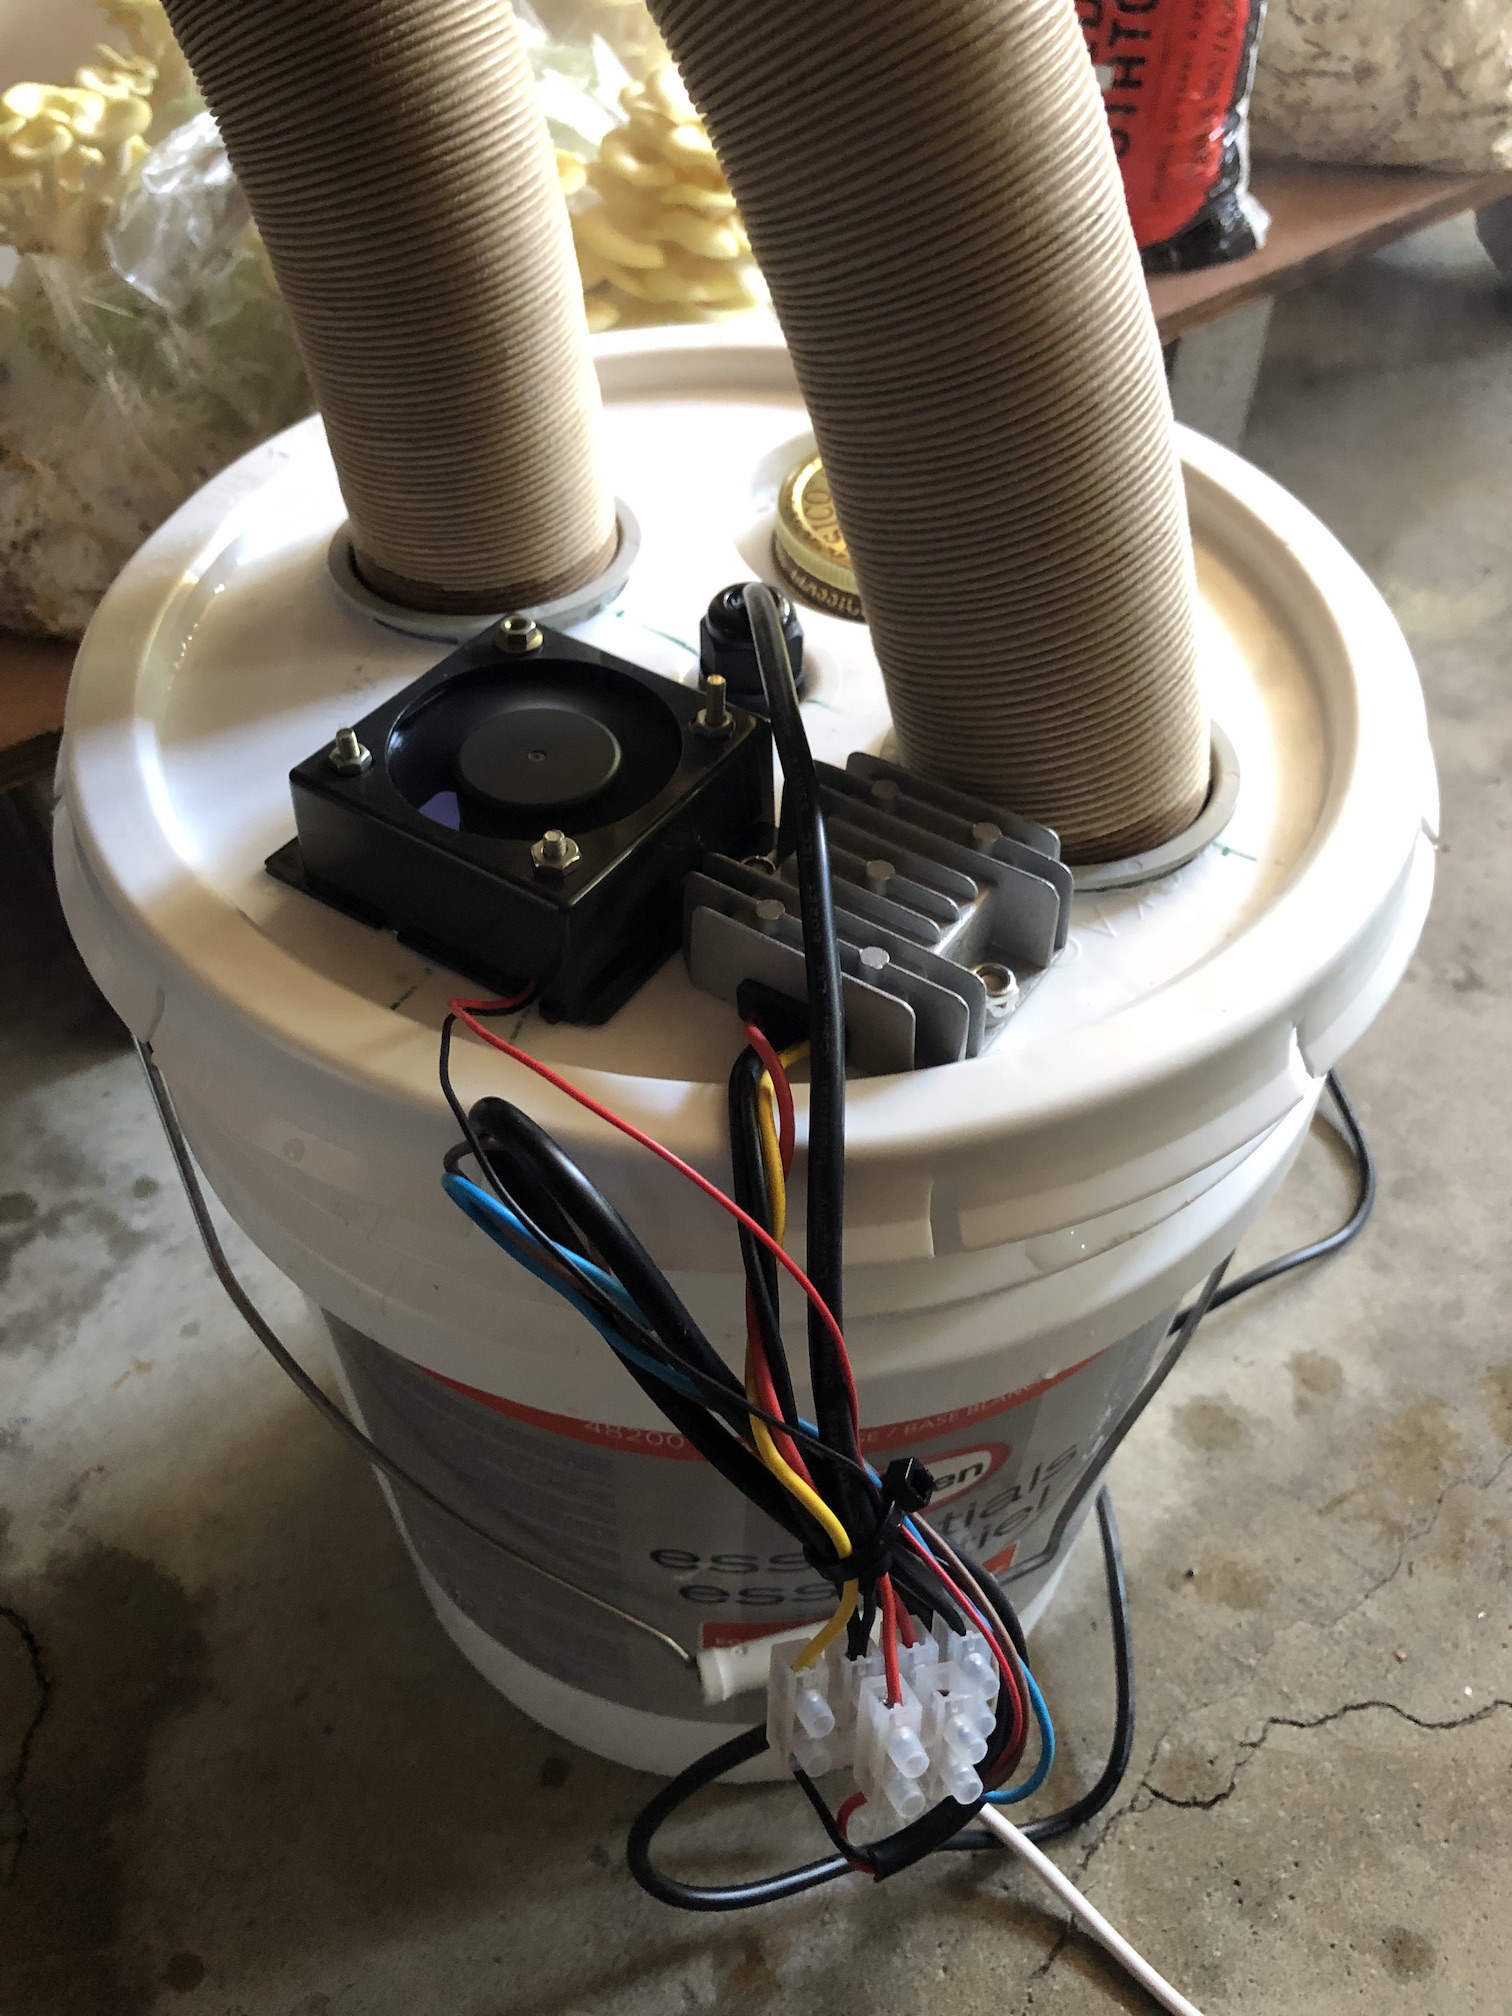
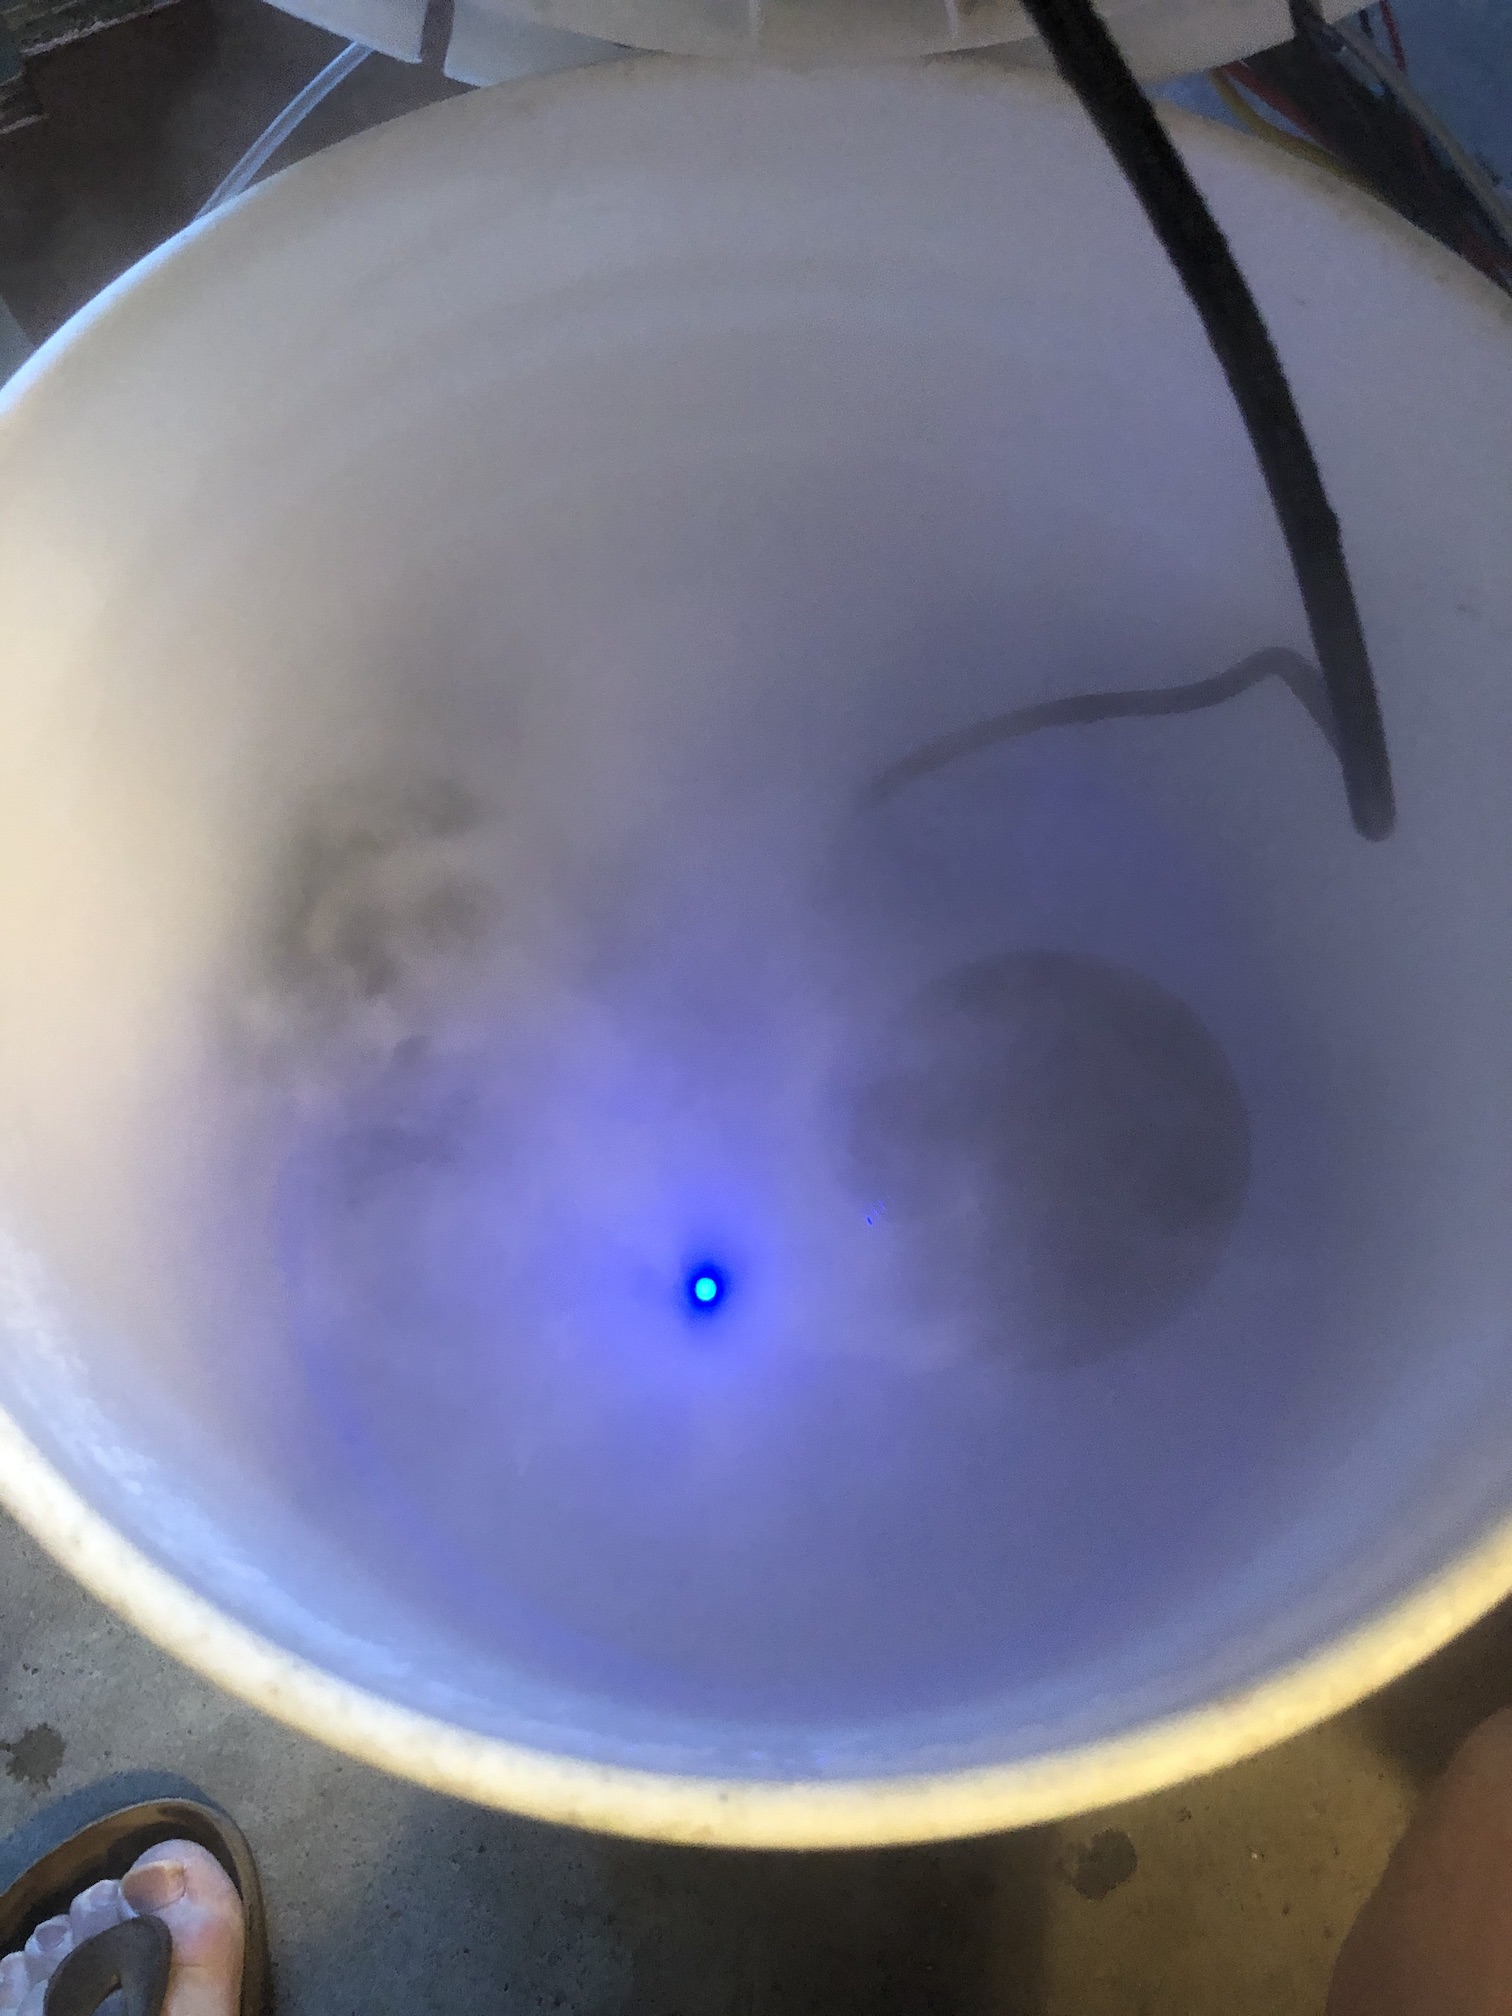
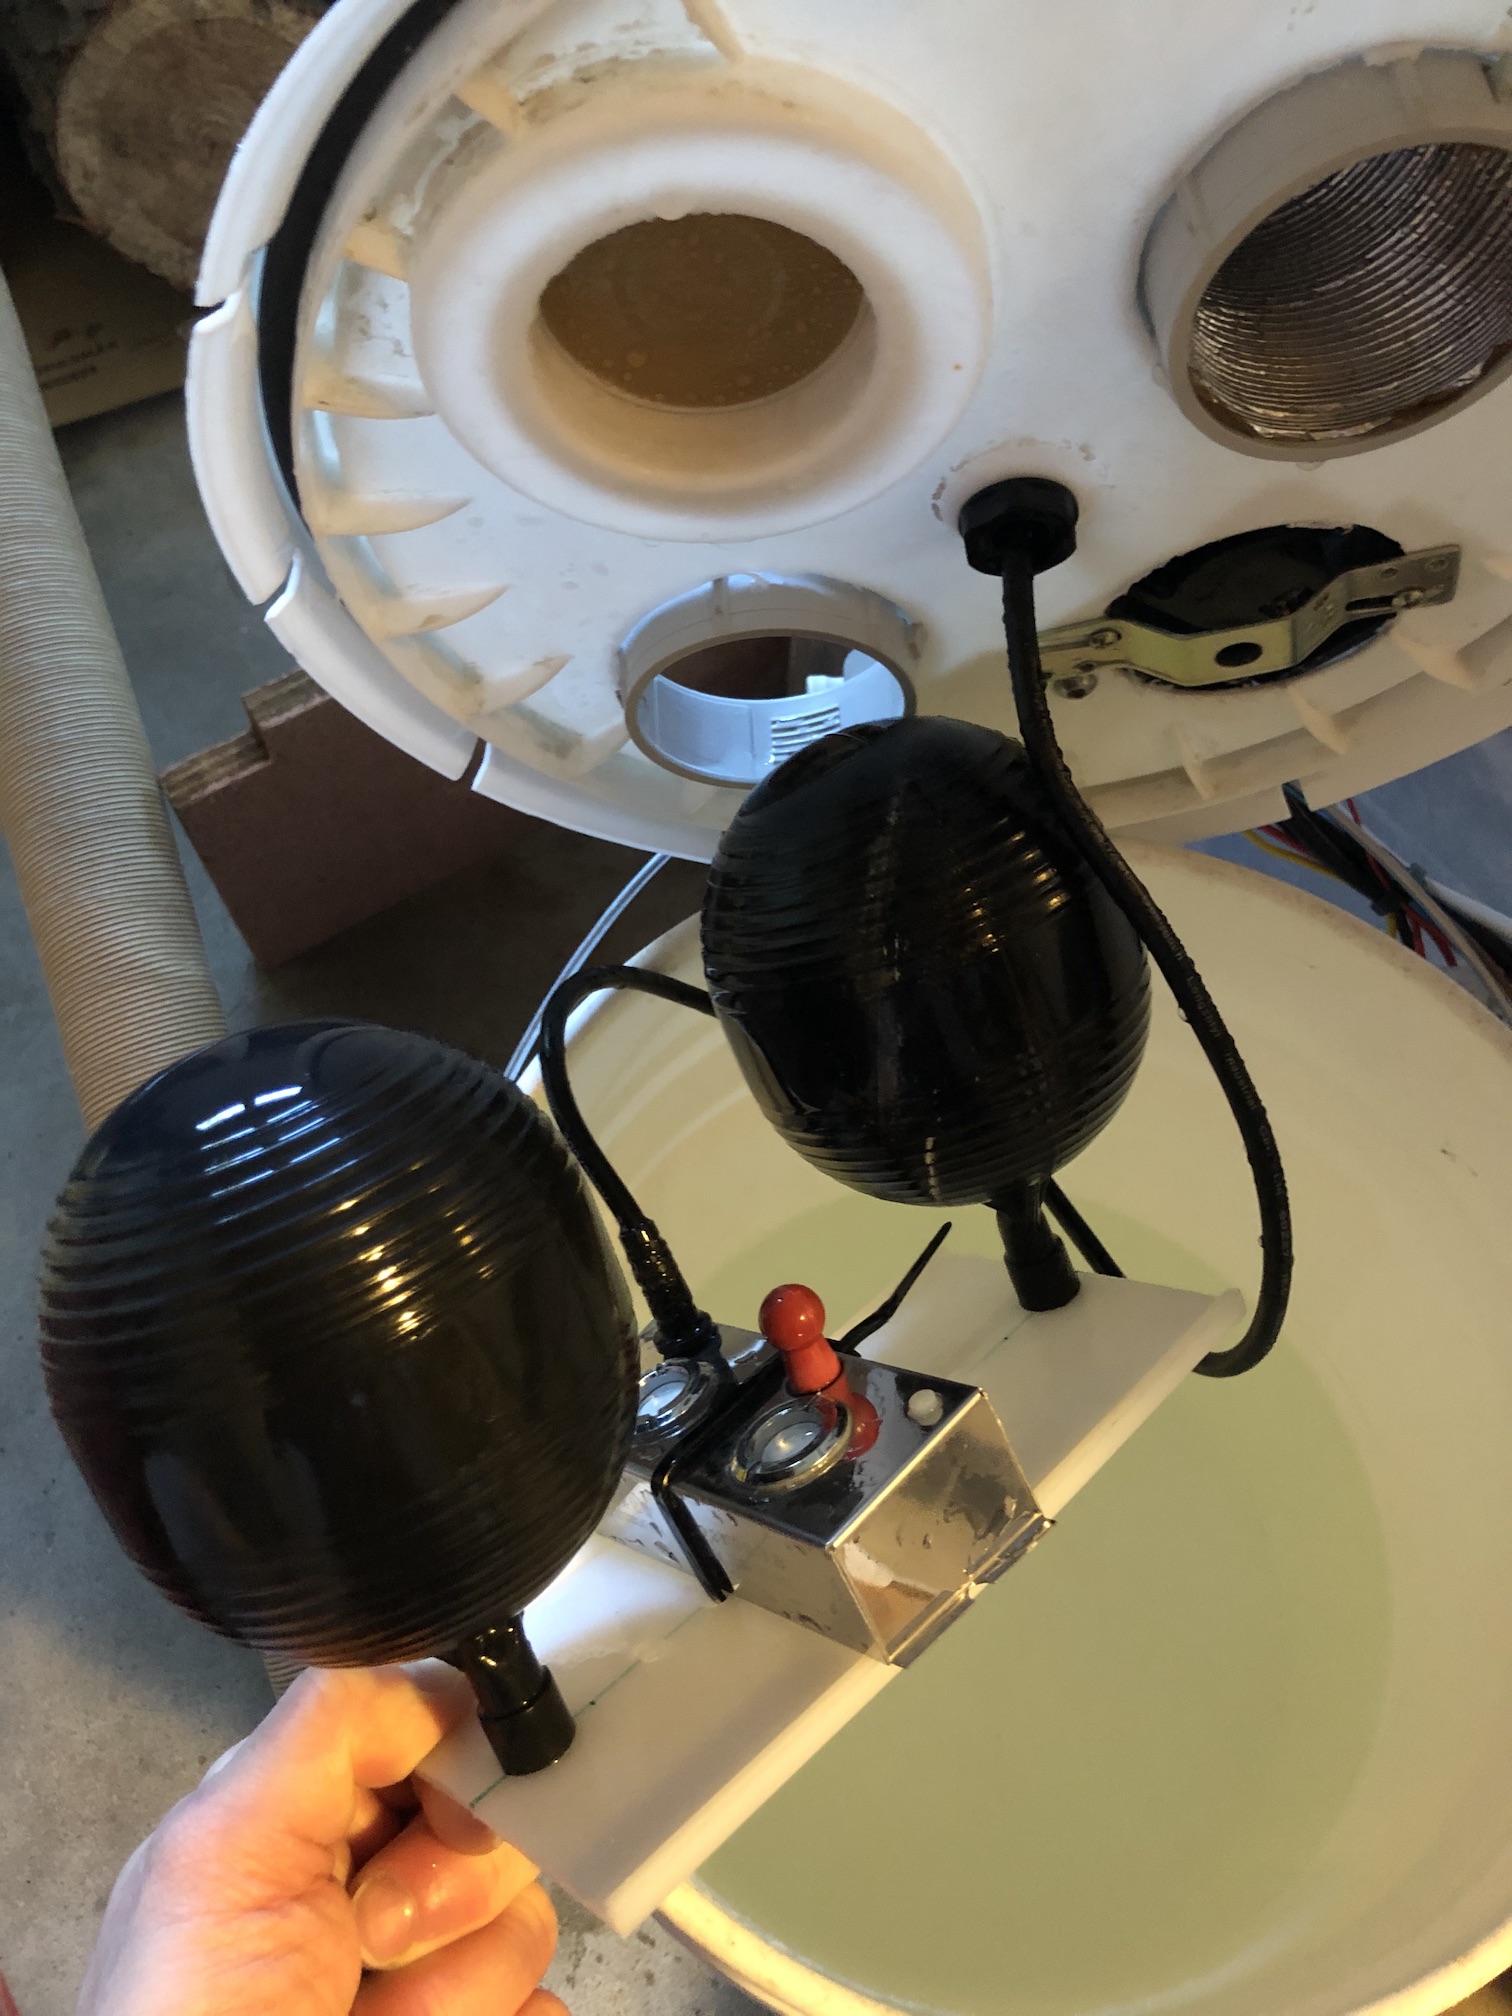
I also bought a 36VDC two head ultrasonic fogging humidifier from AliExpress made from pure shiny Chinesium and built a floating platform for it from some workshop junk and a pair of toilet tank floats. An old 12V computer fan forces the humid air through the system and out of RV heat ducting to the top of the rack. This is probably the most hi-tek part of this design. The old humidifier I rescued from a renovation is probably not sensitive/granular enough for this, so I am replacing it with a digital one. I am using an old 550W ATX power supply, since it has a stable 12VDC output and a step-up DC-DC converter to bring it up to 36VDC.
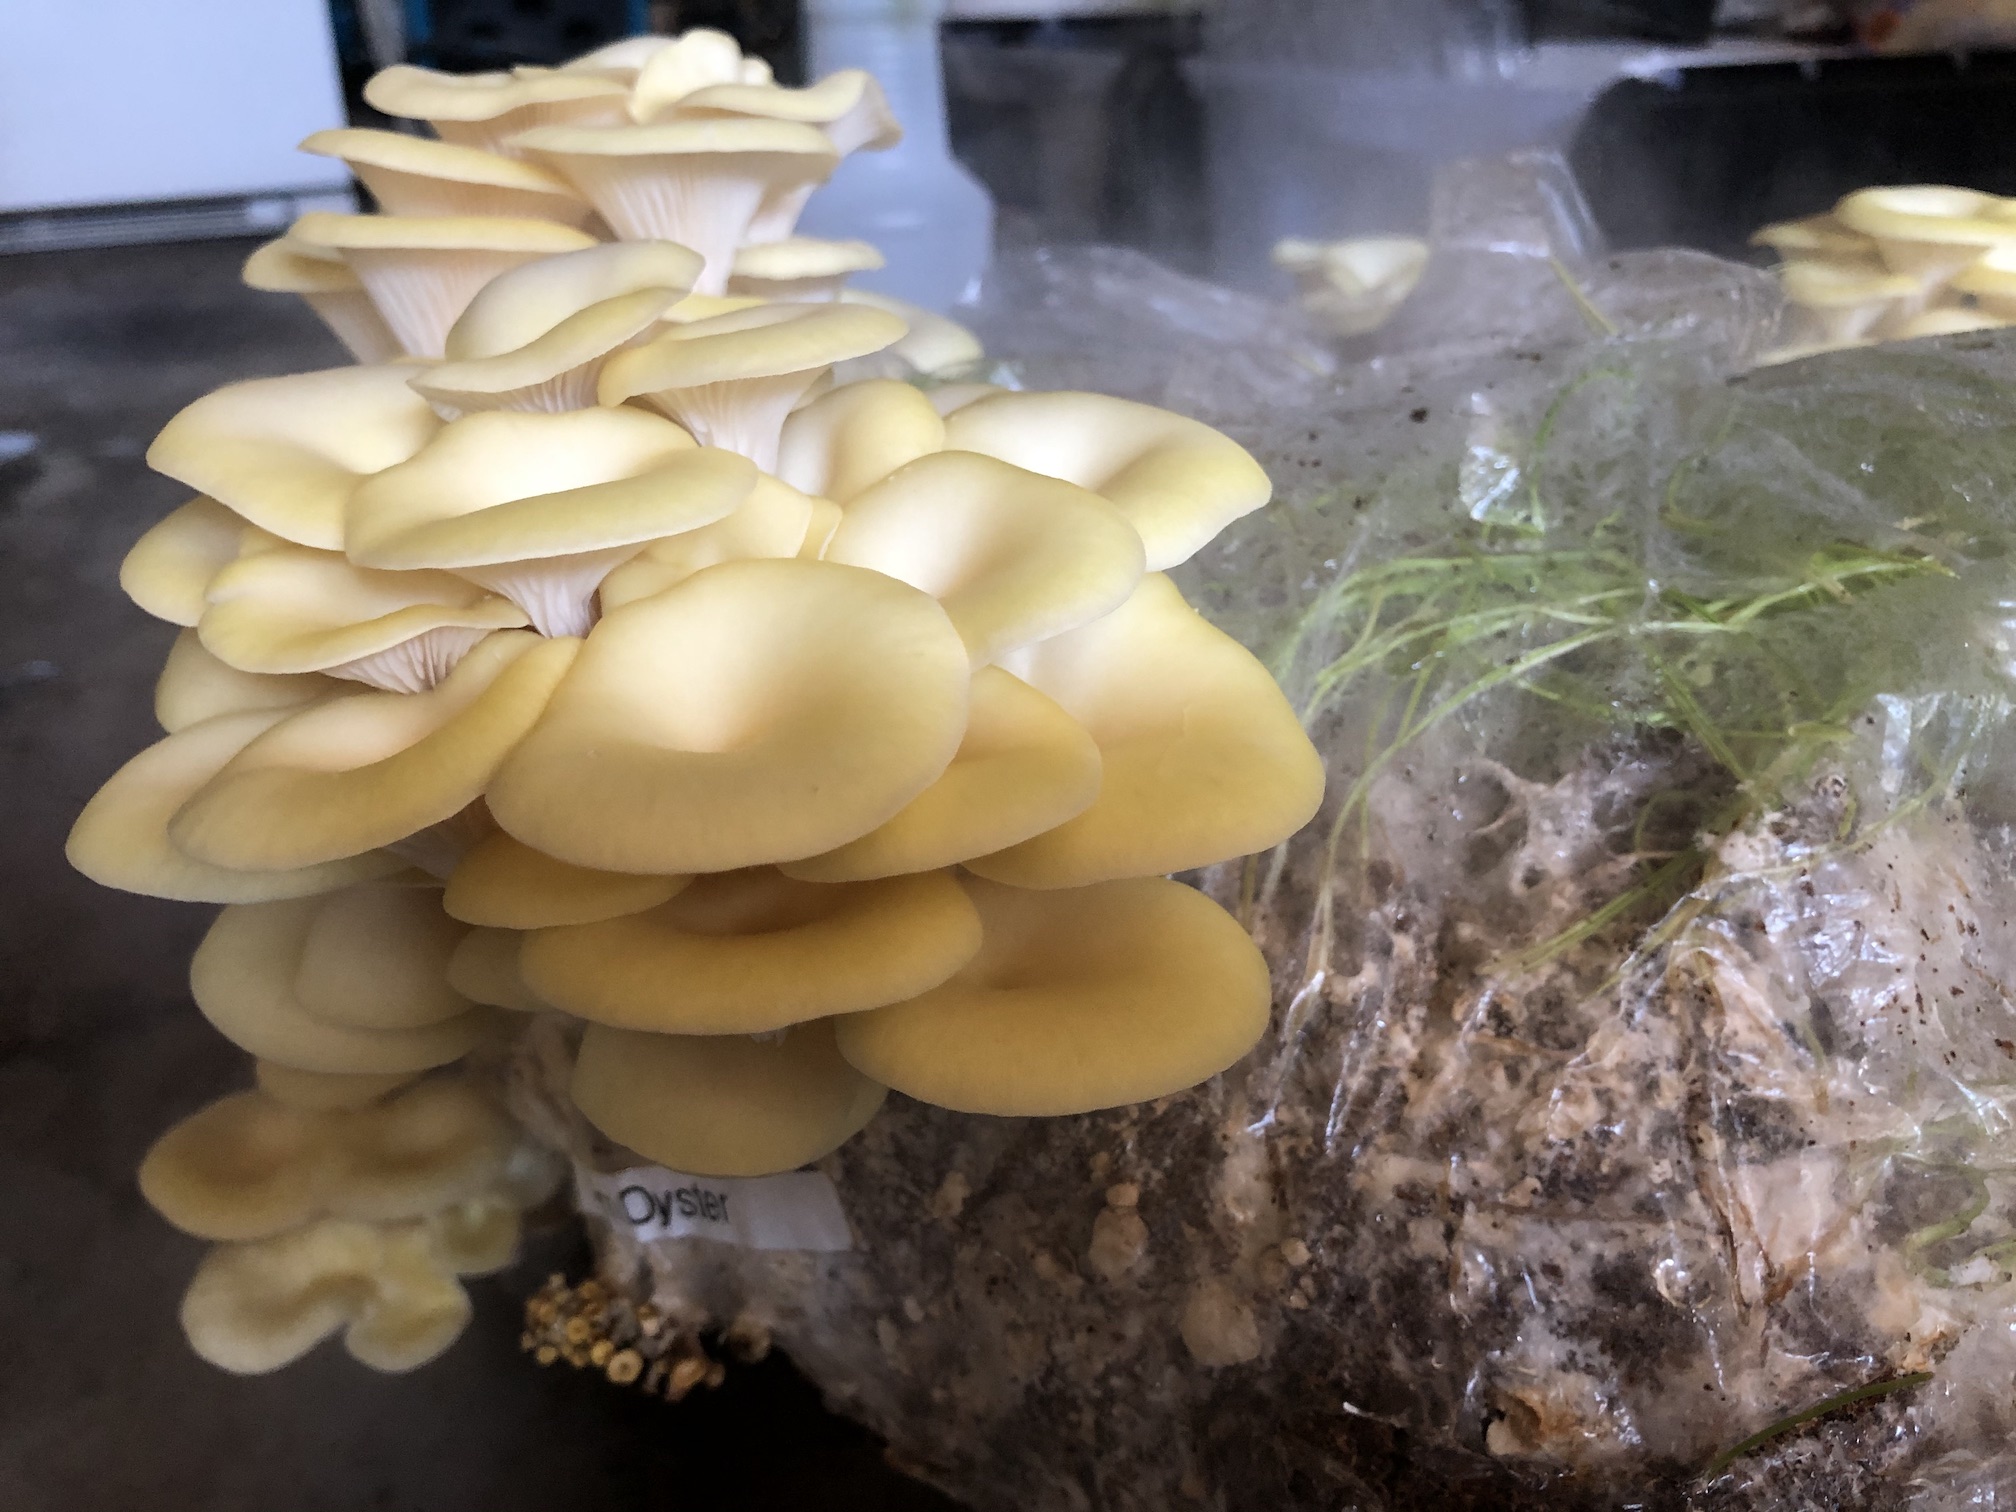
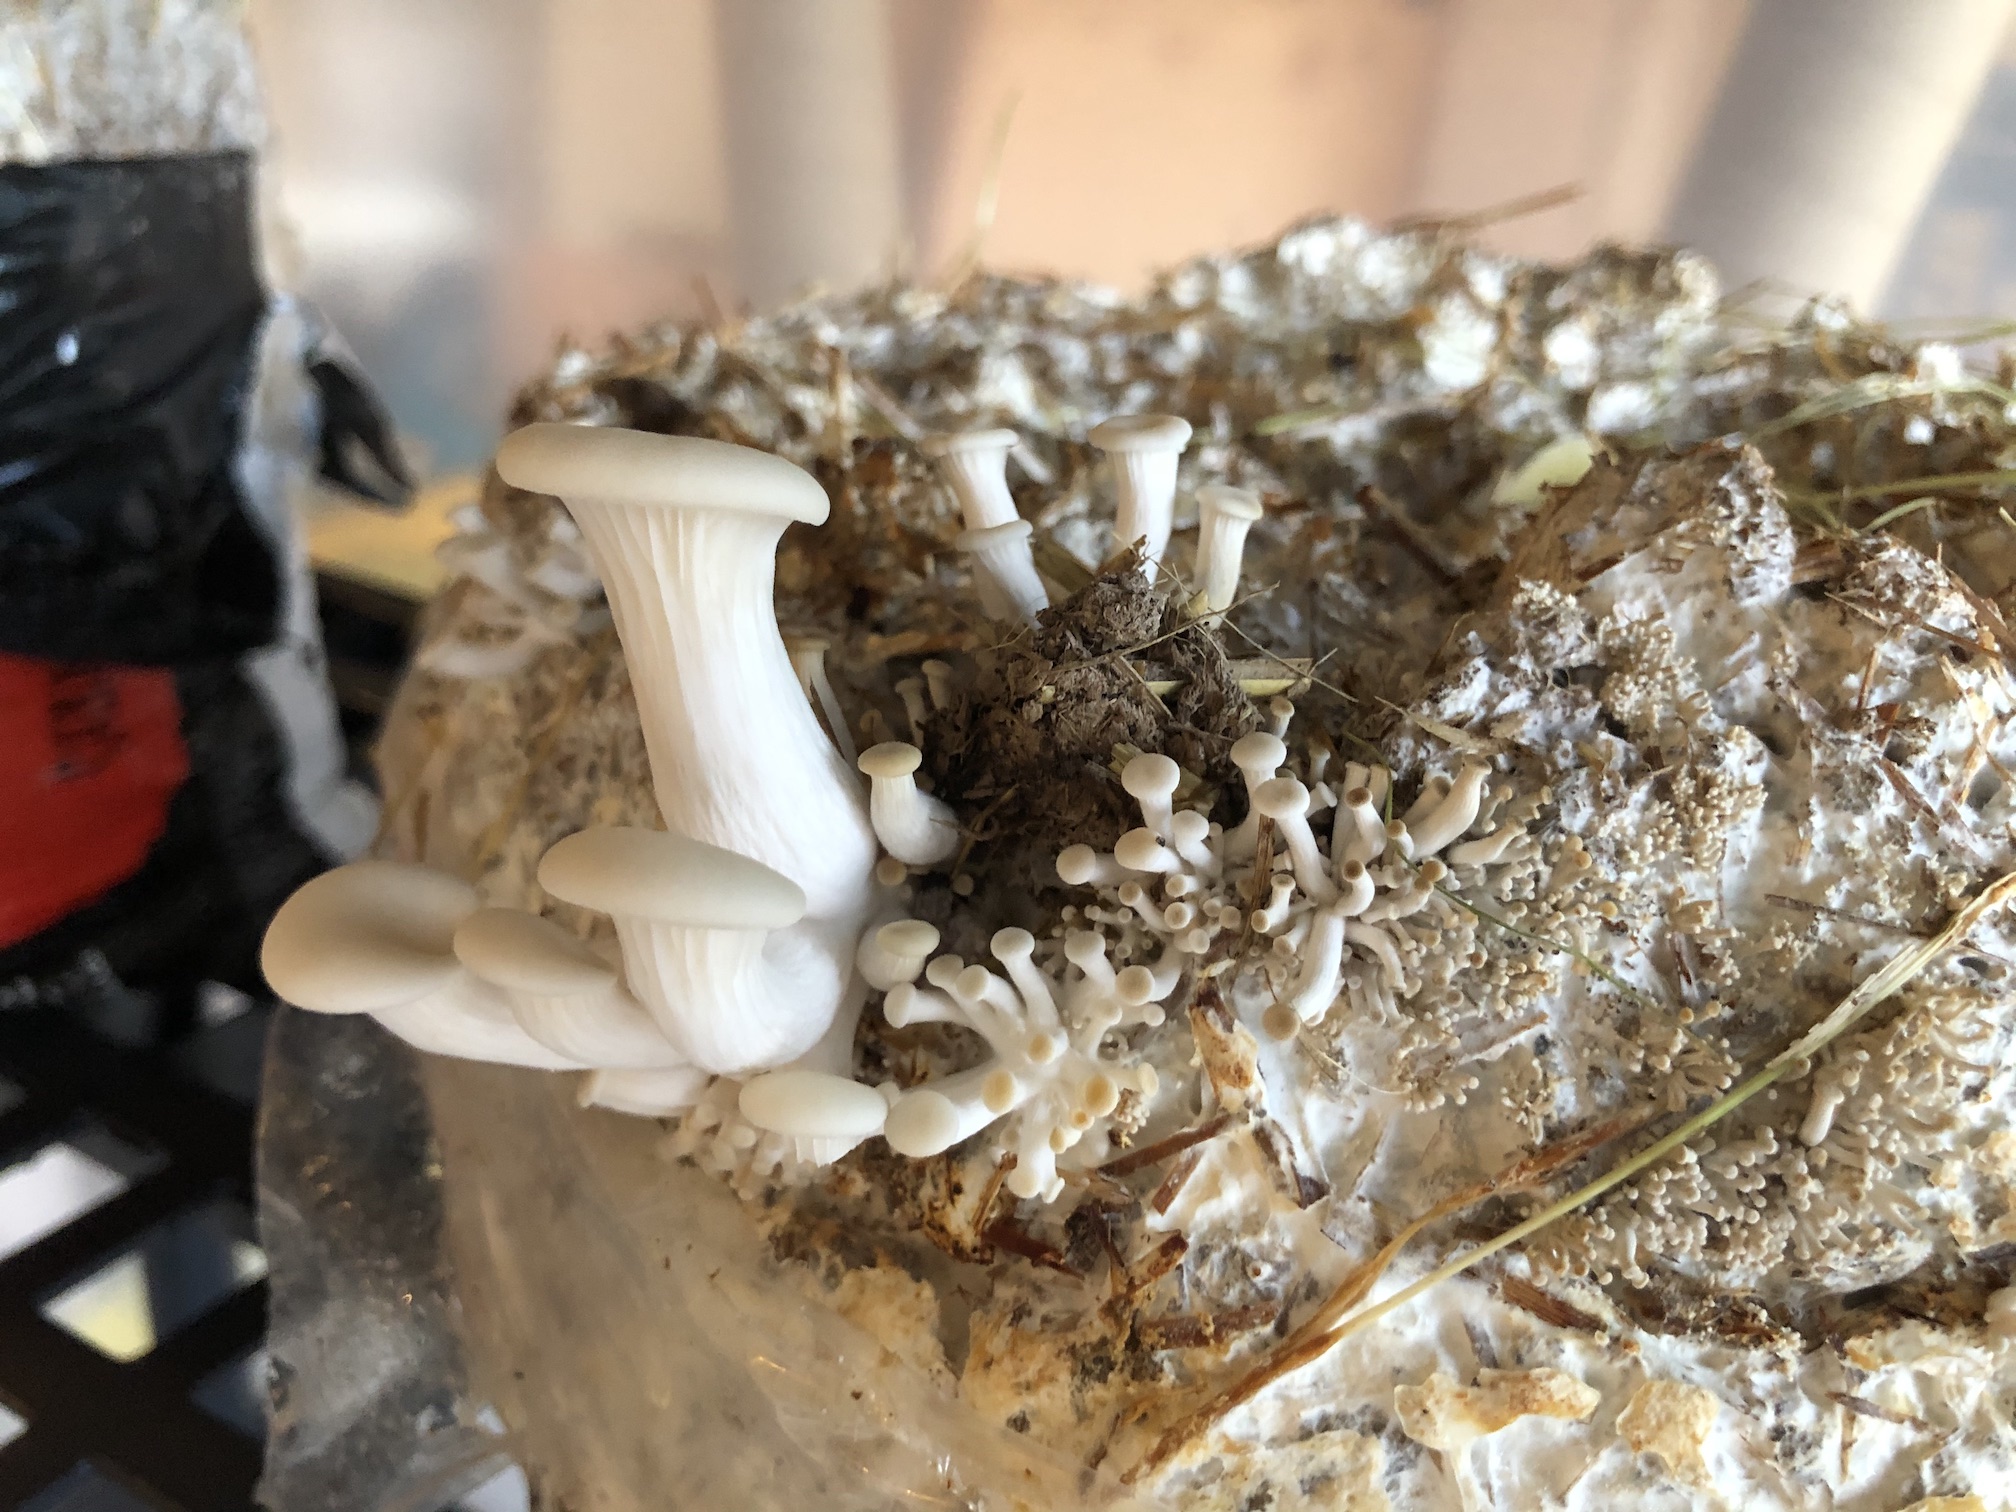
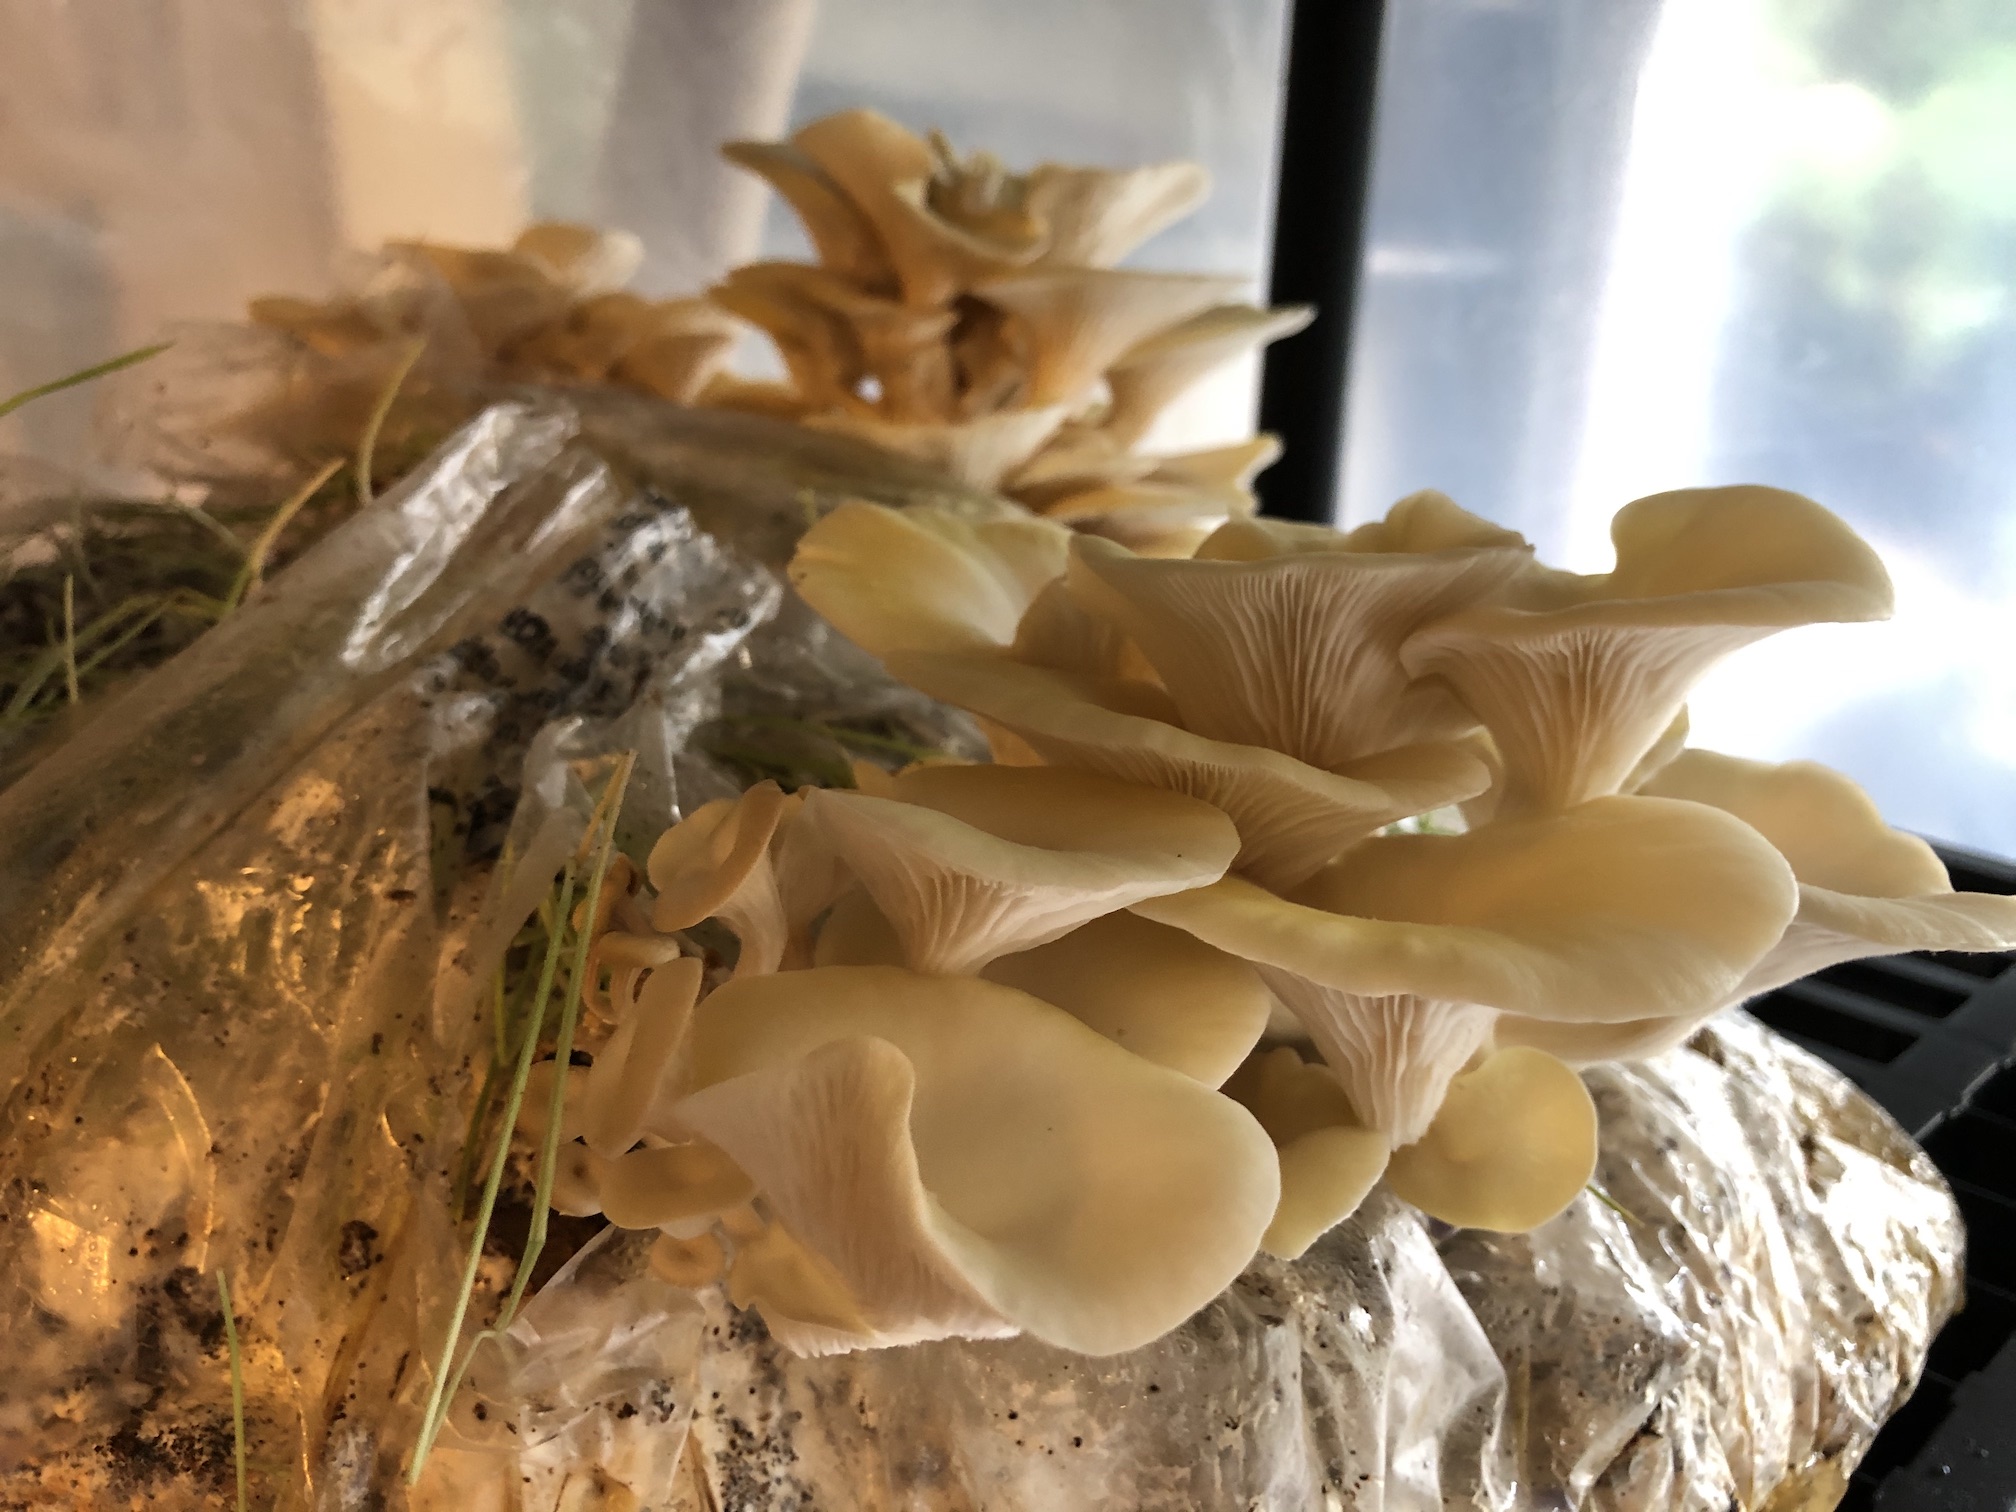
So to cut a long story short, after a few weeks, two out of three bags fruited so far.
Happy cultivating folks! 😬
