Hard Plastic (part one - Shredditor)
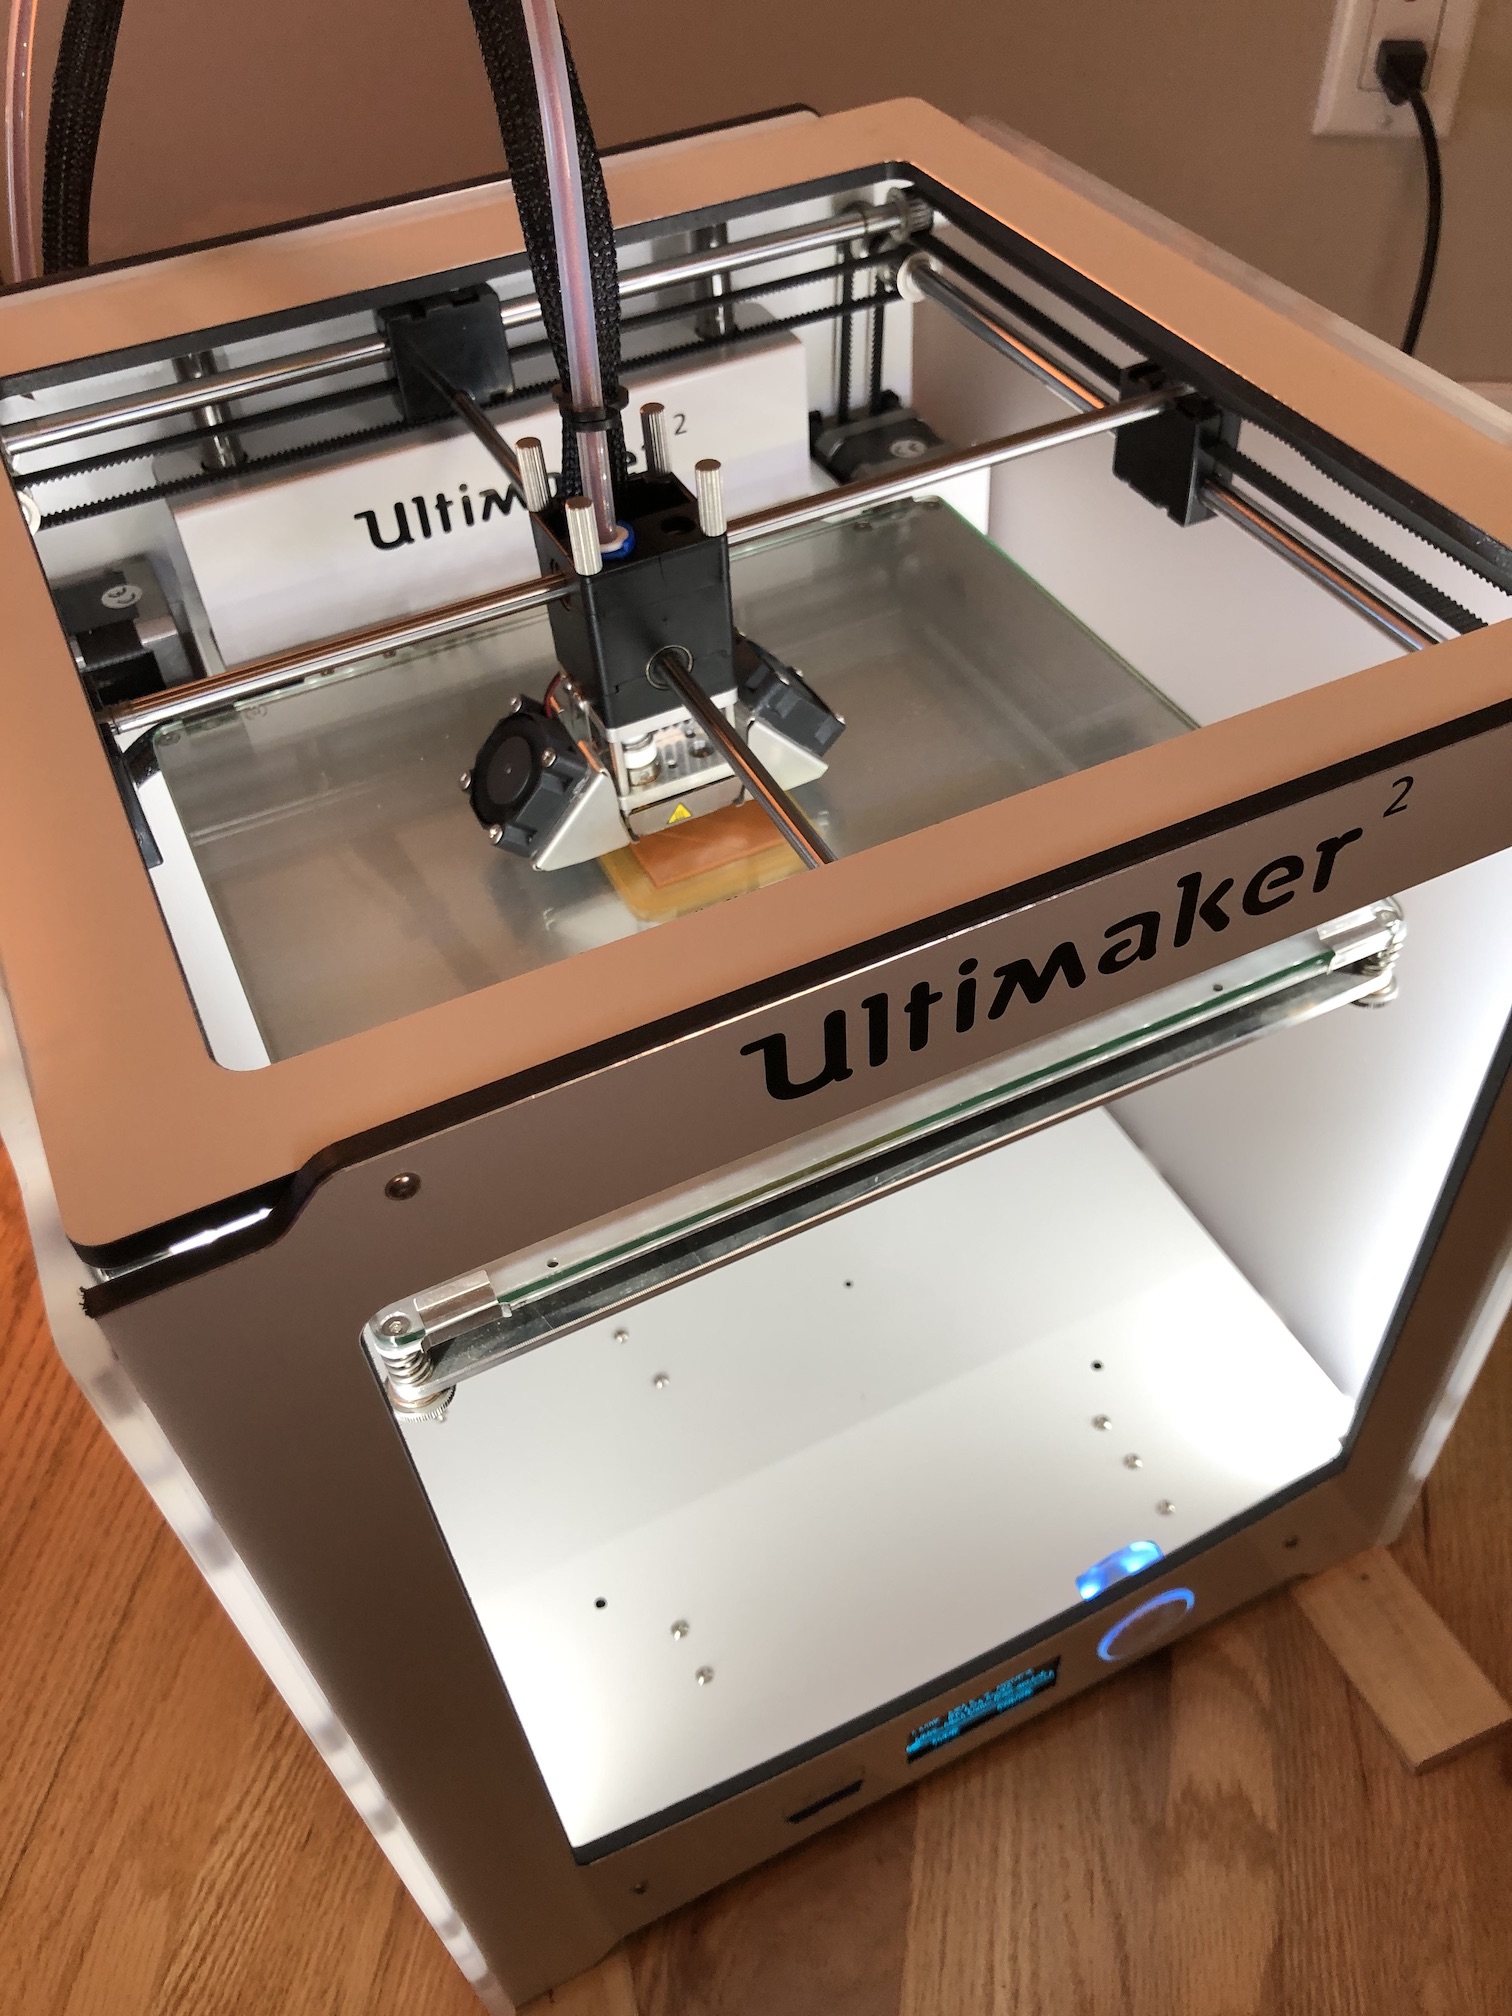
Buy a 3D printer they said... OK, so I did. I bought a second hand 3D printer, from a teenager, perhaps an unwanted birthday present, who knows. Anyway, after a few failed prints, I realised that coupled with the cost of filament and the general size of the pollution problem in the world today, the trajectory of continuing to fill my garbage with more waste plastic is not sustainable, either morally or environmentally.
Moreover, while sorting through the plastic recycling, having just spend a hundred dollars on a few spools of commercial PETG filament, I noticed that , at the same time we were "recycling" quite a bit of PET(e), HDPE, PP and Polystyrene weekly. And all of these thermo-plastics are perfectly suited for fused filament fabrication (3d printing).
So, I thought, wouldn't it be nice to "close the plastic loop" in my household. And this is when I learned about Precious Plastic, One Army and all their machines, namely the shredder and the extruder. This part is about the shredder...
So you want to build from kit (or maybe buy? assembled) a machine that shreds plastic? OK, it seems fairly straight forward. Being fairly conservative with spending own money, I decided to go the DIY route. There are a few main components, namely:
- a motor and a power supply/source
- a gearbox
- a knife box
- a frame
The latest (v2.1 at the time of writing) knife box (AKA shredder) plans are available here, so you just need access to a laser cutter to get the parts manufactured. For the North American audience, since these are metric plans, you are going to have a hard time finding metric steel stock and machines to do this job locally. Though there are an increasing number of folks in the US and Canada providing metric parts now, you can go to eBay or visit the bazar to get your metric kit shipped from Europe. Also, these folks are shipping some improved (heavier-duty) designs, which look fairly solid, so you'd be advised to check them out.
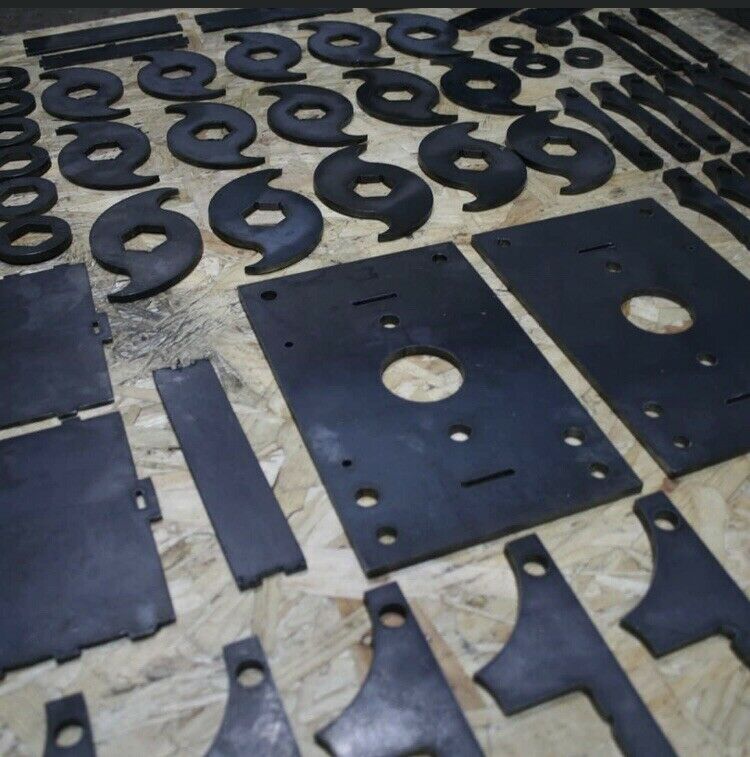
Be advised, there will almost certainly be some post-processing/finishing required on your shredder parts, depending on the quality of the laser cutting. A belt sander and a grinder are a must. Also, aim to get a pre-keyed shaft, otherwise, uless you have a CNC, you'll need to pay extra to get the keyways cut. Also, you'll need access to a welding machine. A small MIG unit with flux core wire is perfectly suitable for this. Also, you could ask for two sieve brackets with your kit, so you can have options for a finer and a courser plastic grind. Your local iron monger will have perforated stainless steel sheet to complete these. The rest of the hardware, such as metric nuts, bolts and threaded rod can be purchased locally in North America from big box stores or specialist fastener suppliers.
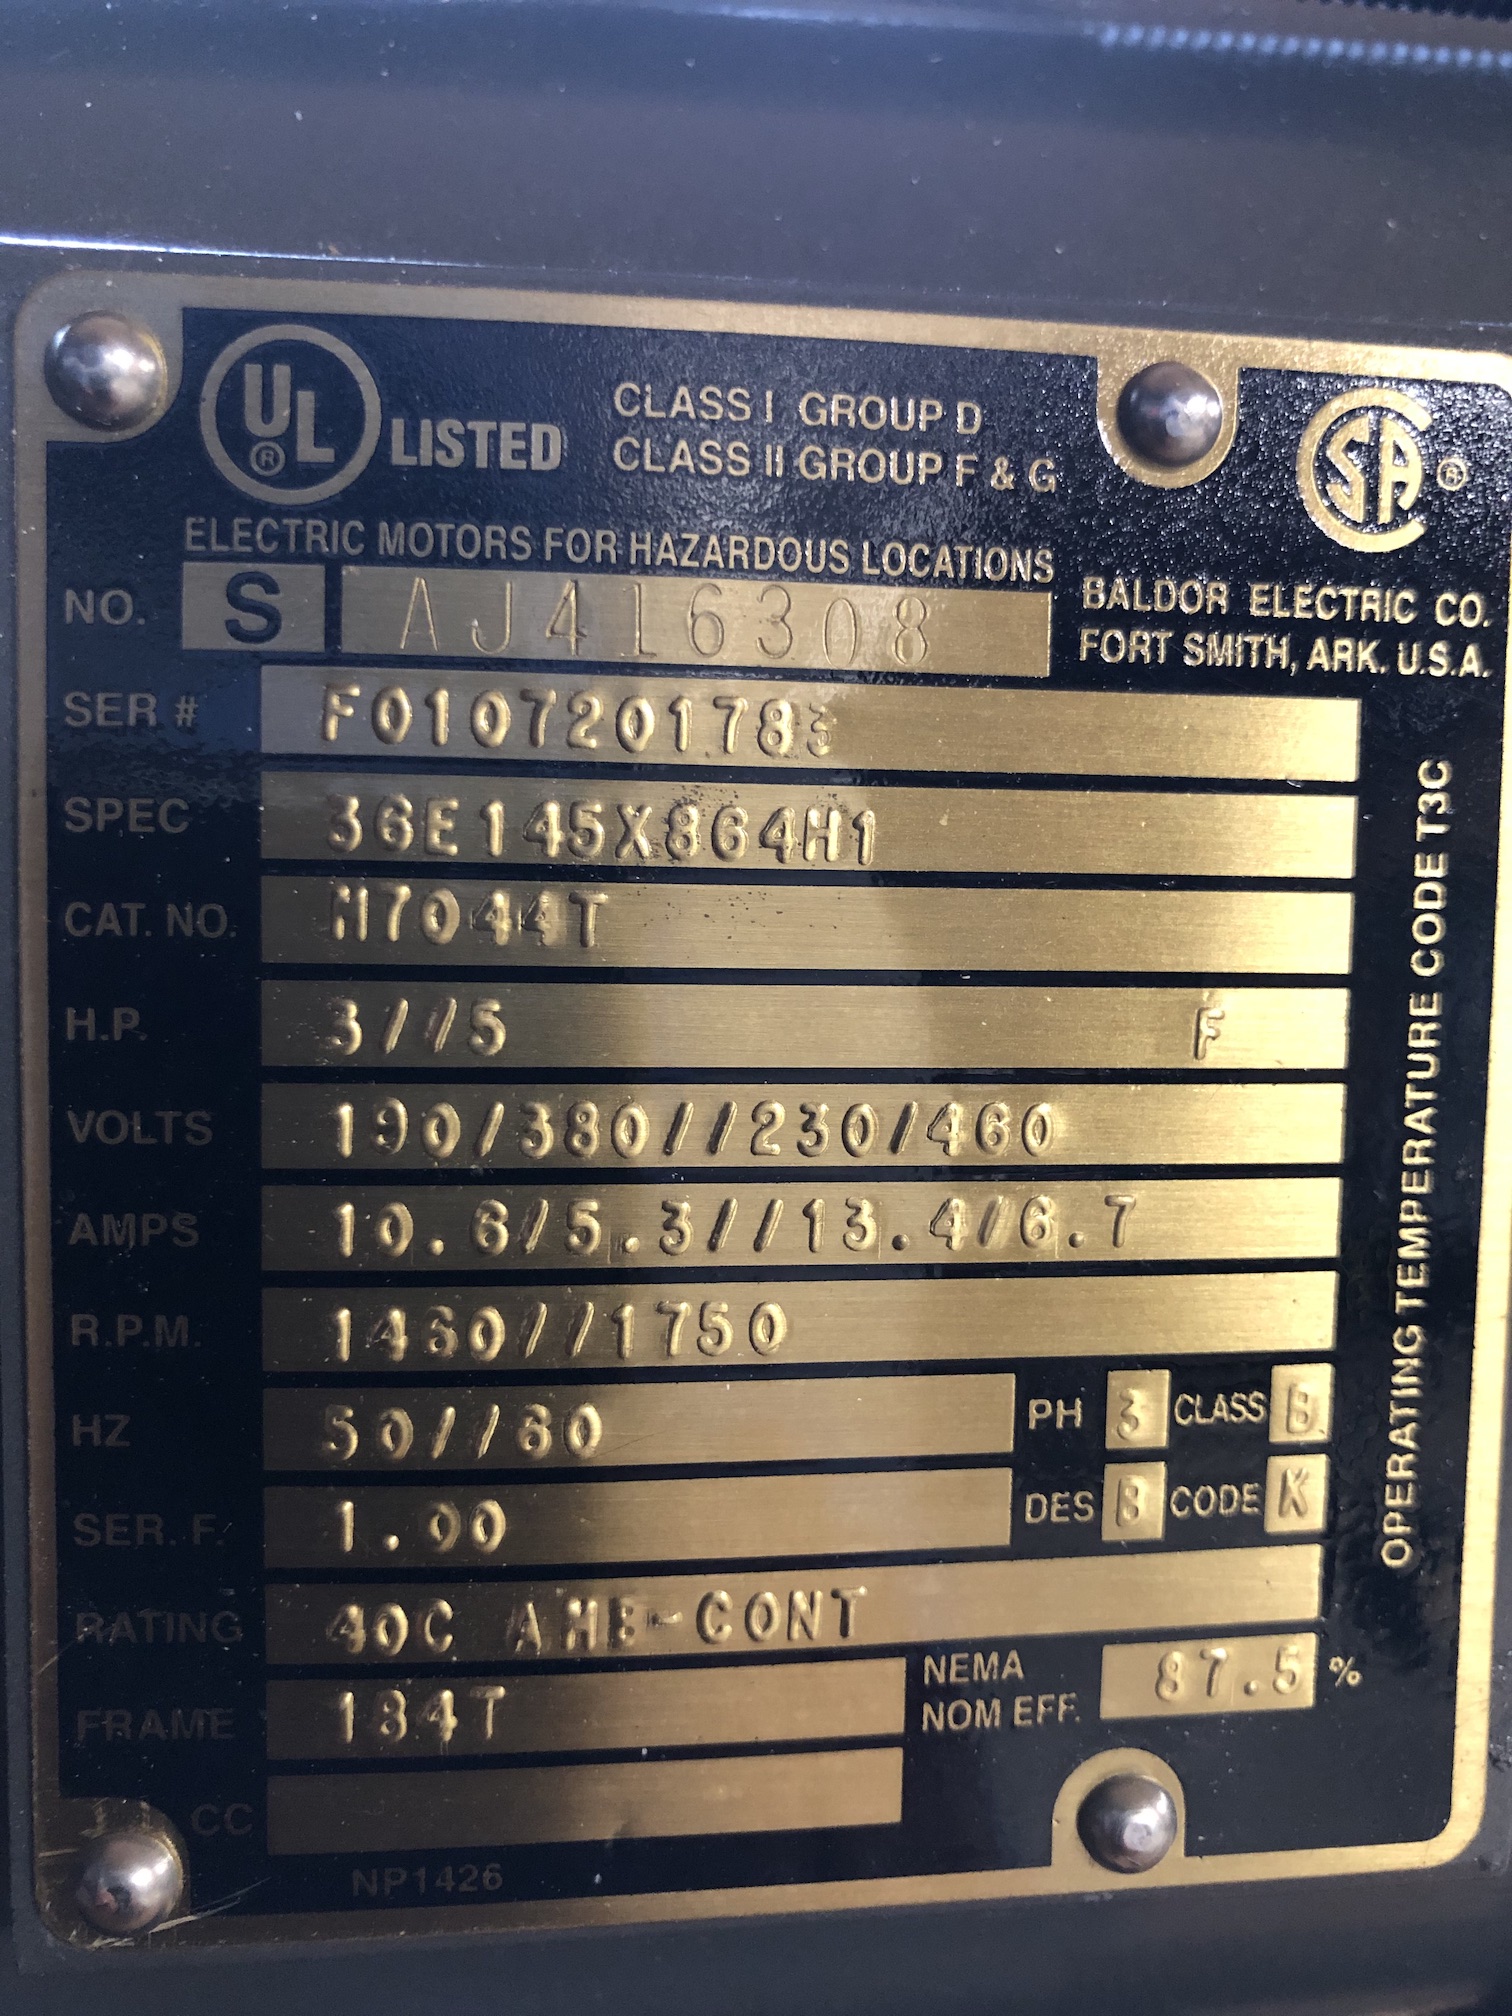
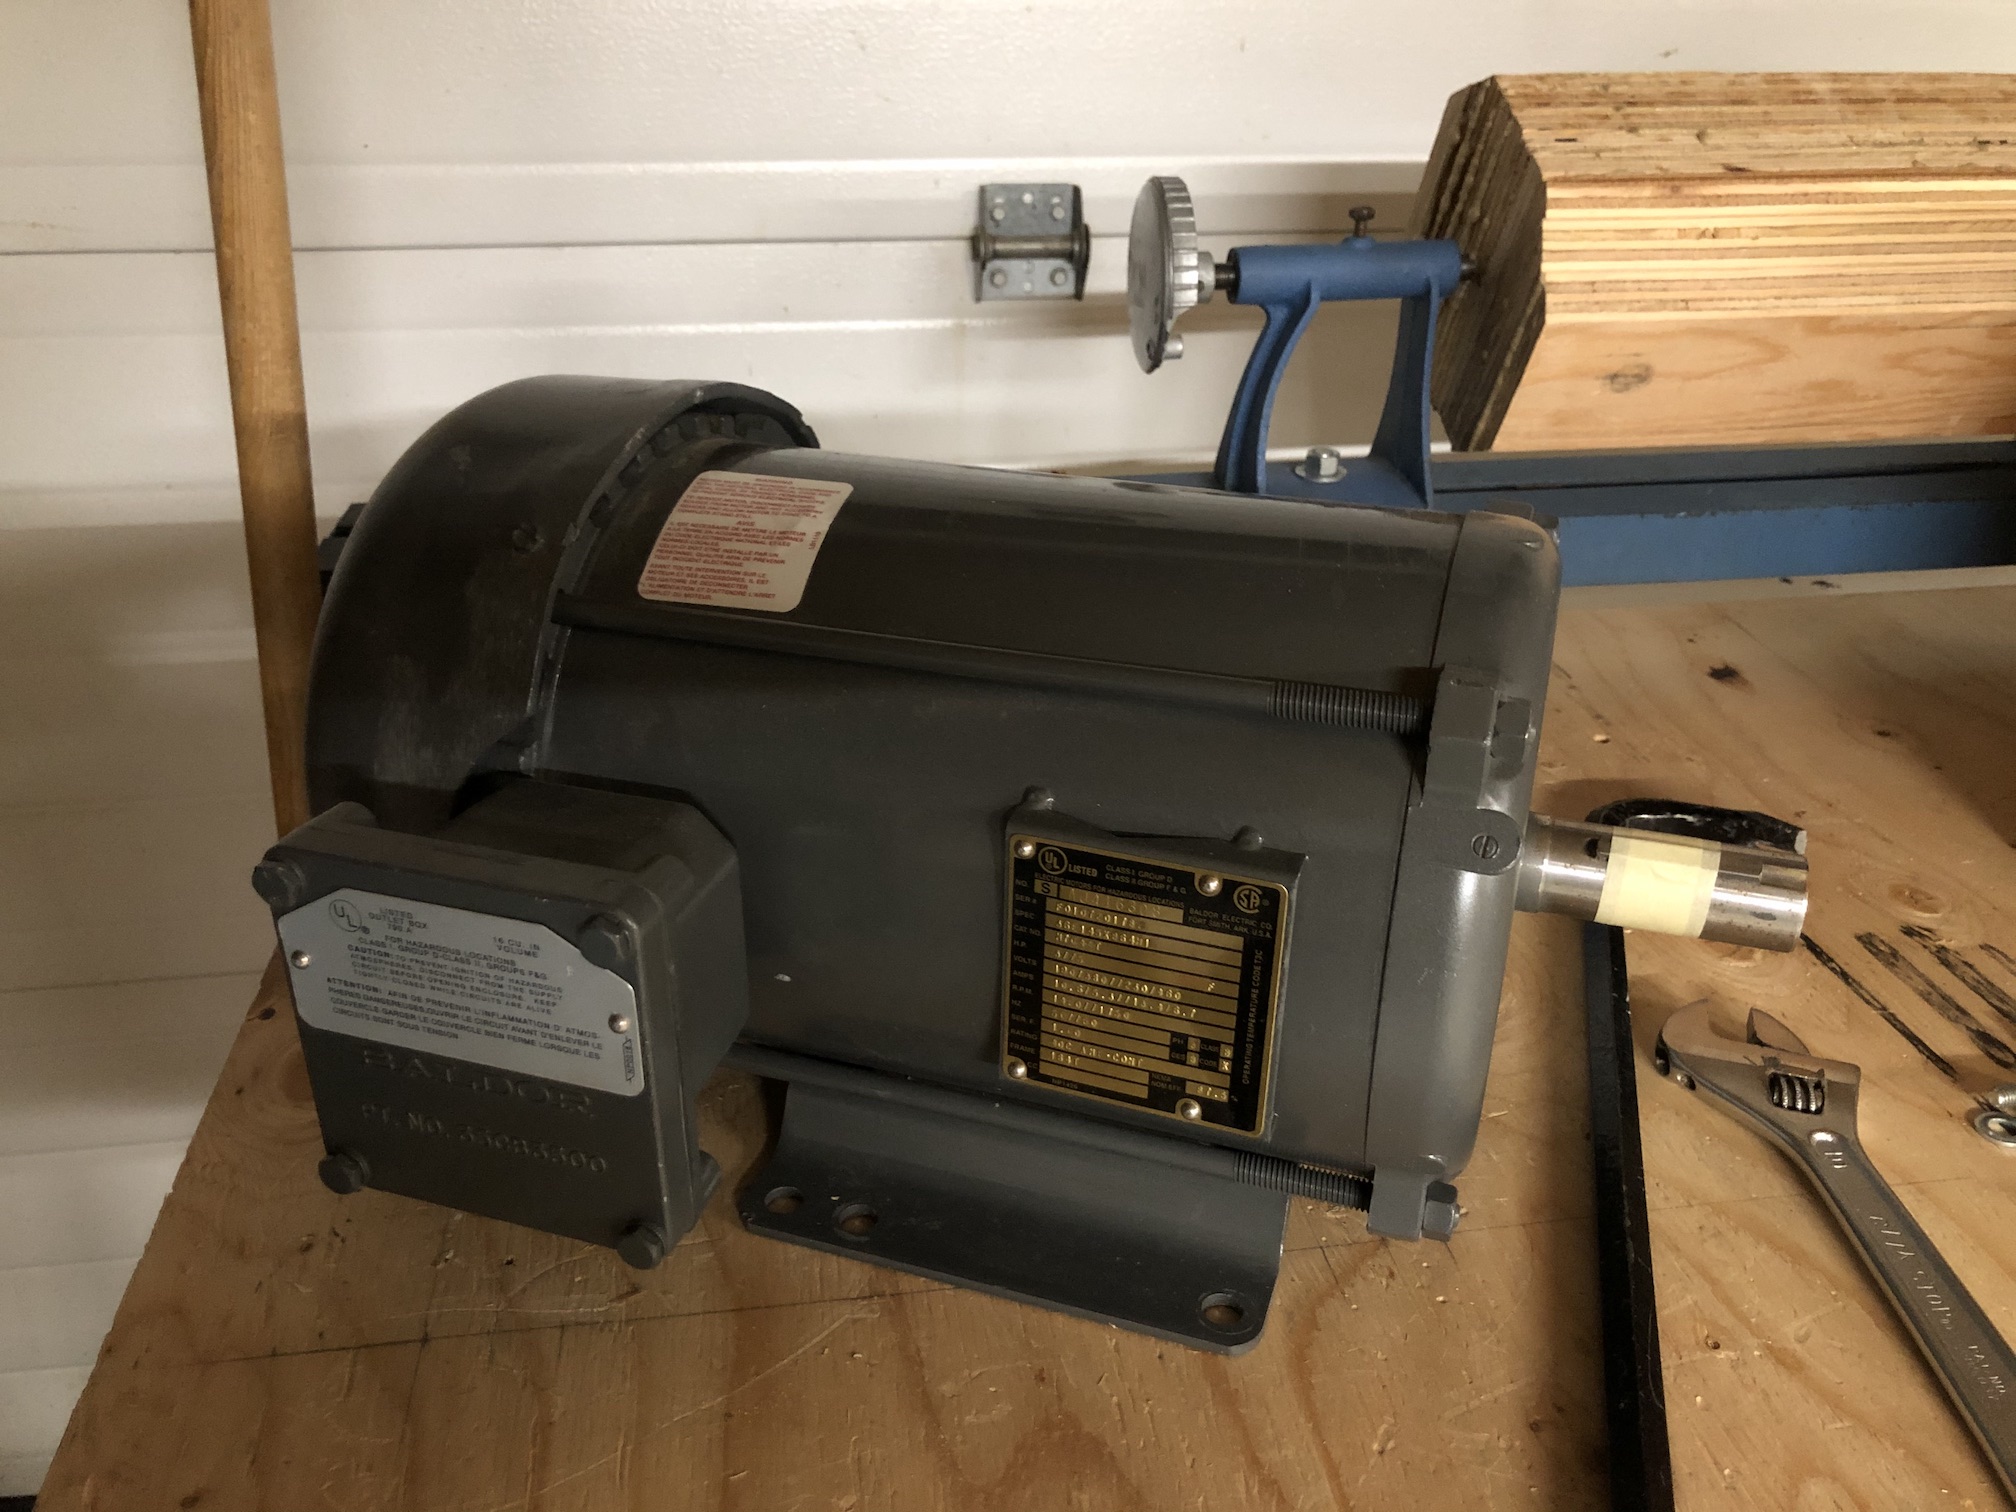
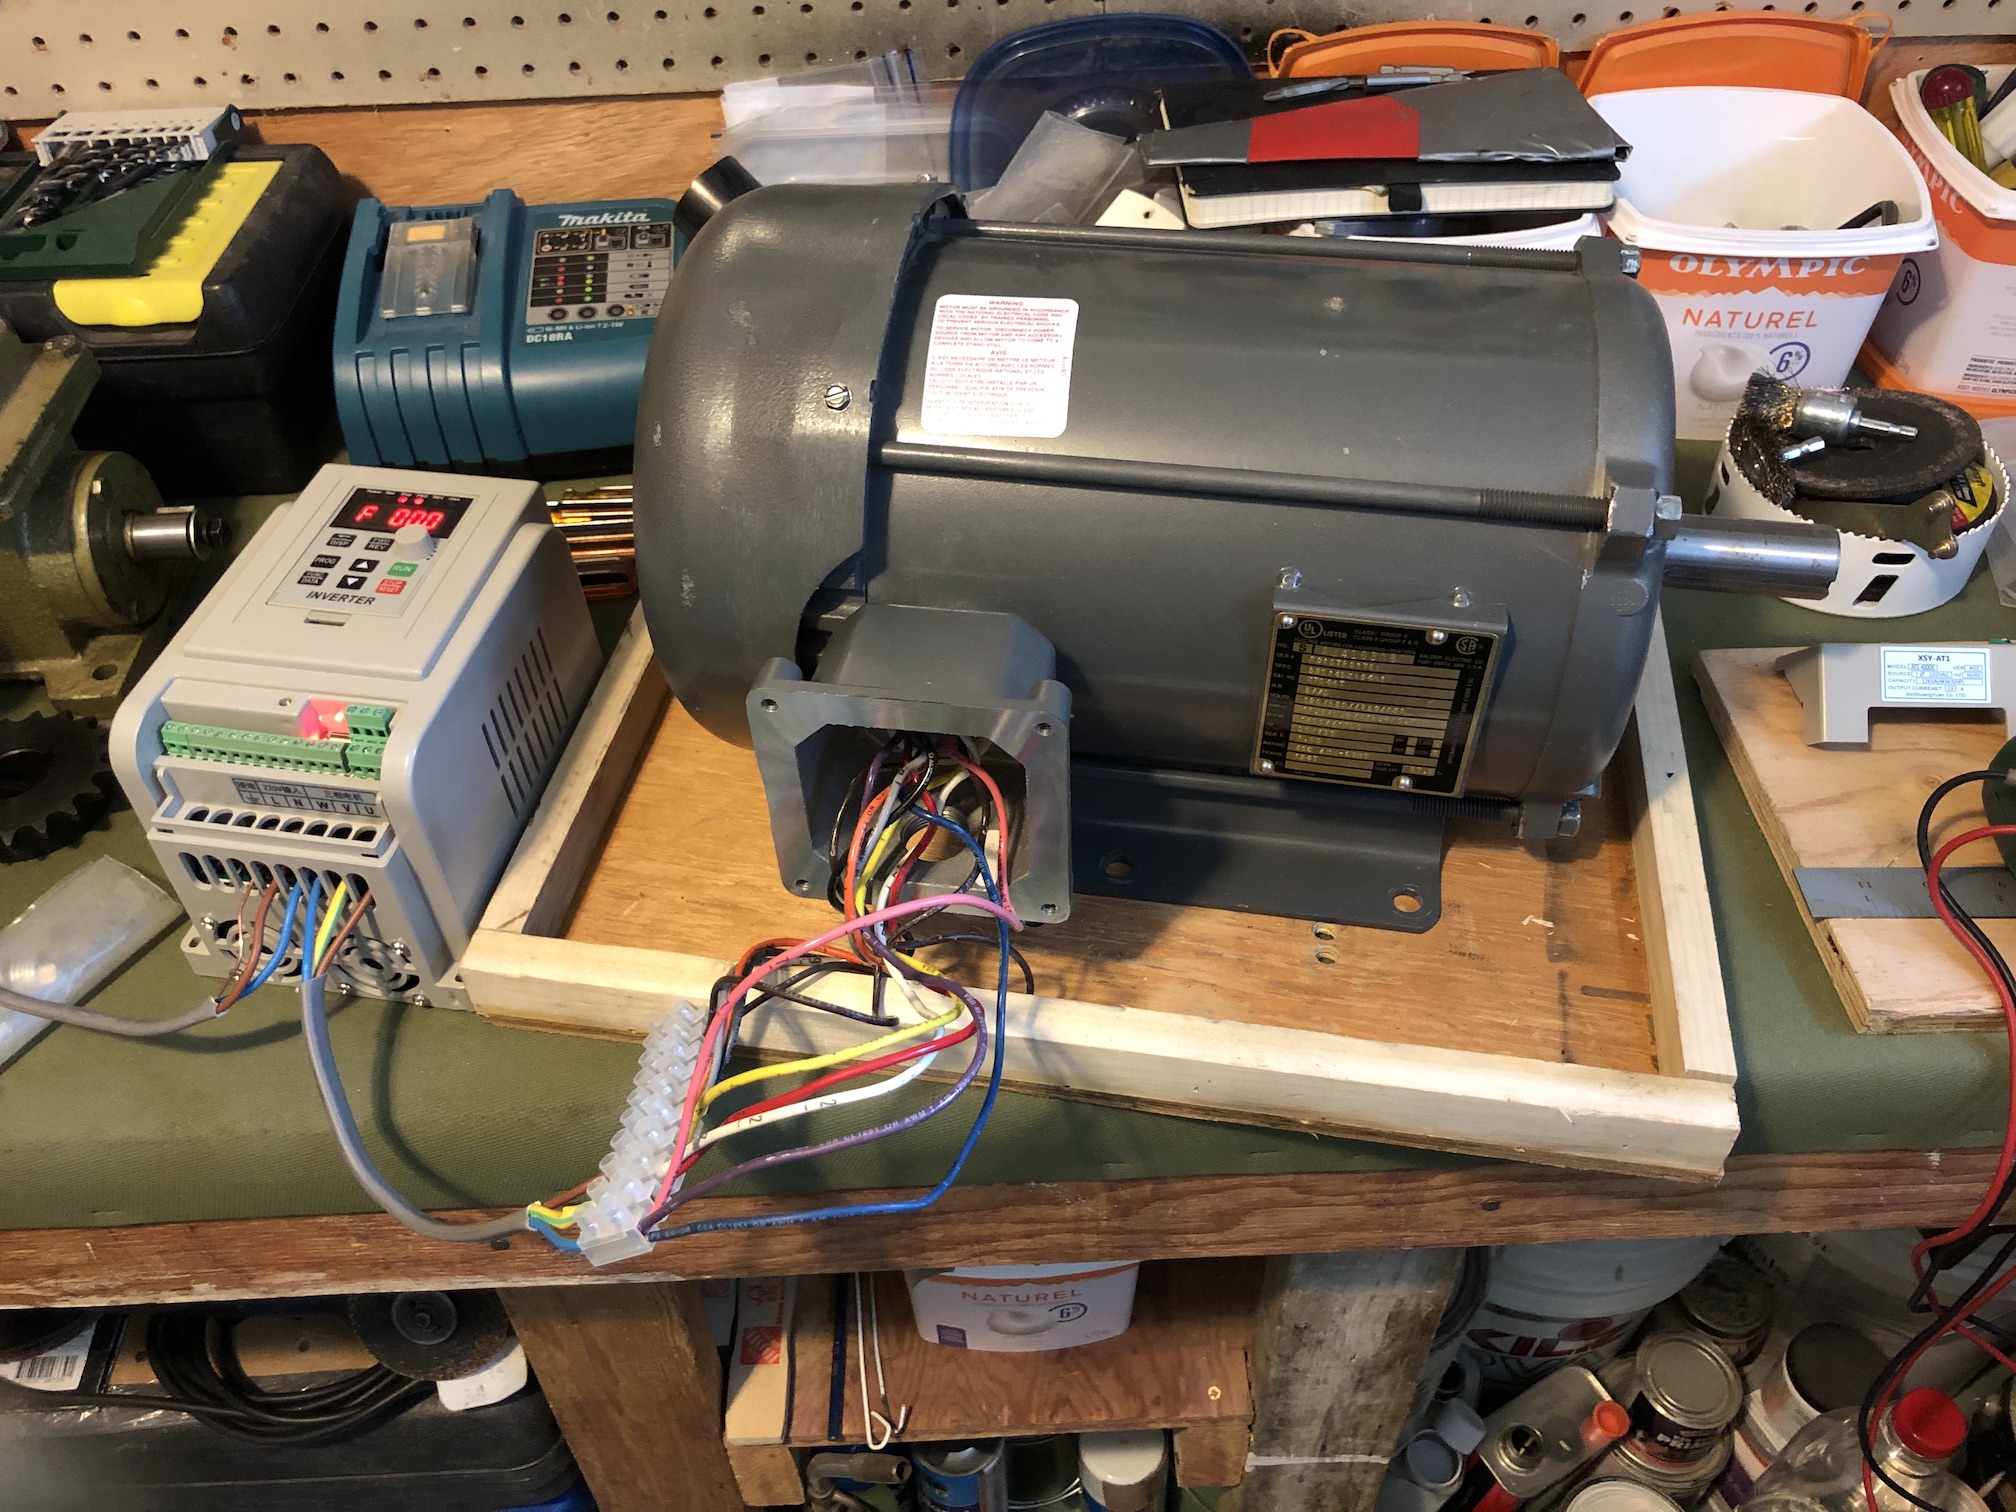
Next you need a motor. The amount of tourque required for this is approaching light industrial levels, around 300nM. There are some discussions on the old forums on the motor specs, but it is clear, that two phase motors are generally not suitable, as well as anything under 2kW. I bought a Baldour 3HP three-phase motor from a local second-hand marketplace to be driven with a "4kW" Chinese VFD @ ~220V AC (in a delta configuration). In case the VFD doesn't come with a manual. These VFDs are readilly available on Aliexpress as well, so shop around. They also have a RS485 interface, so it's possible to drive them with a Raspberry Pi or some other SBC with GPIO and an appropriate HAT.

According to the motor plate, for the low-voltage configuration, the maximum load is 13.4A, which is fine for a domestic supply.
My motor is also very heavy and difficult to lift (with one person) oven though the delivery guy brought it all the way up the stairs :/
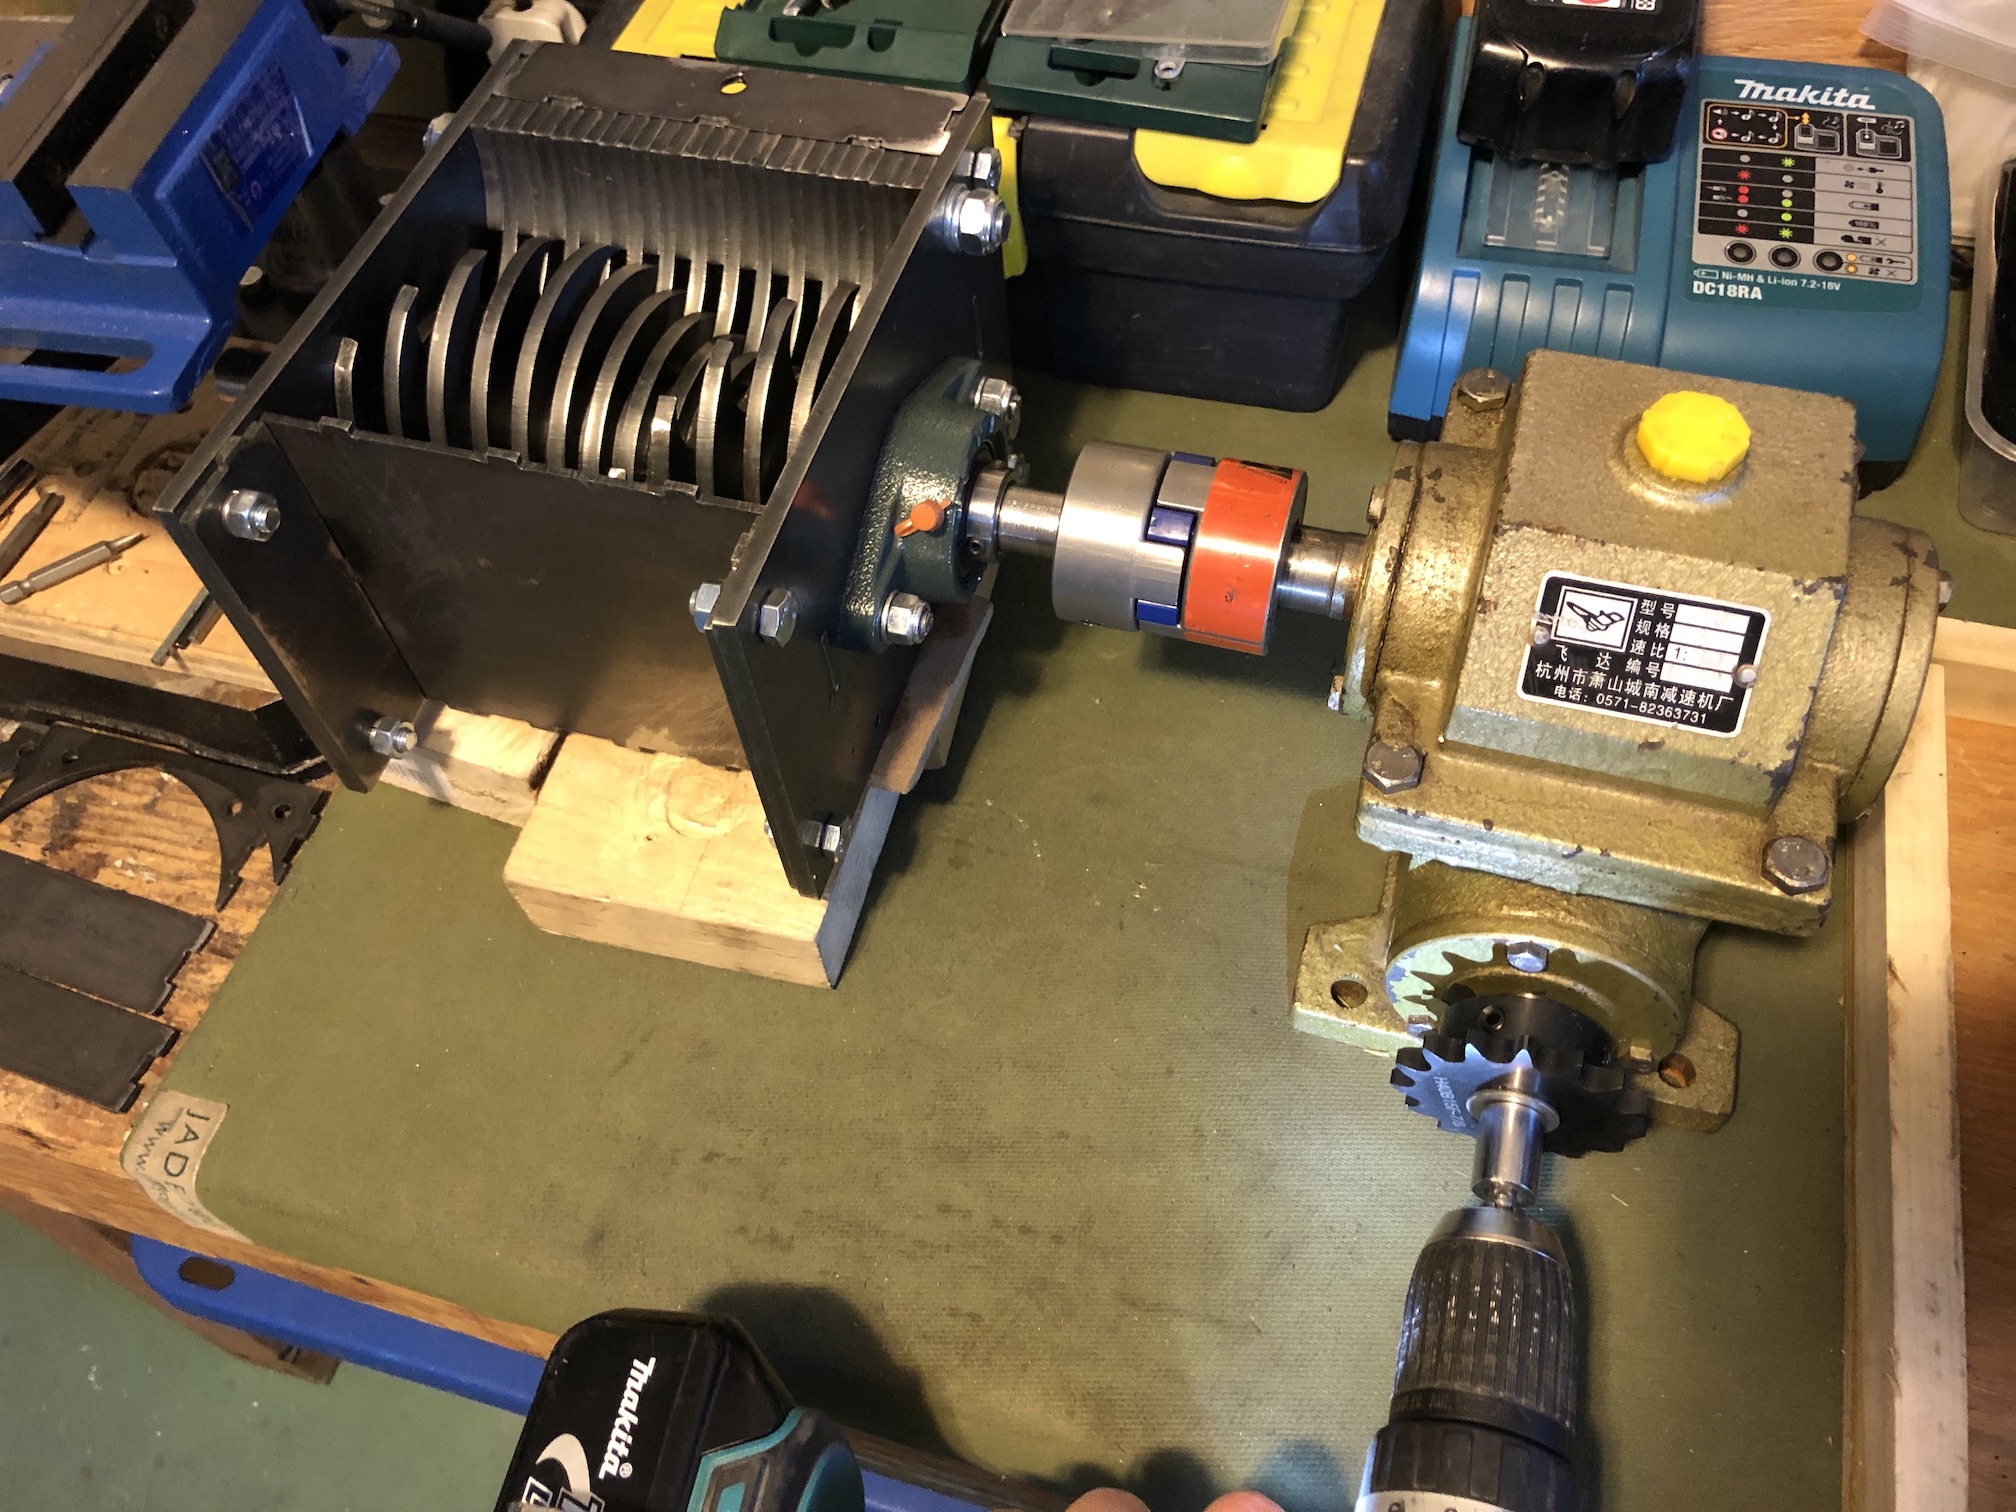
To comlete the mechanical parts of the project, you also need a gearbox. Your motor will run at around 1750RPM @ 60Hz (slightly slower at 50Hz), which is a little fast to spin your blades (unless you desire carnage). So to slow things down you'll need something around a 30:1 reduction ratio. I ended up sourcing locally, a gearbox that, from what I was told, came from an animatronics (godzilla?) park, which went out of business. This box has 25:1 reduction ratio, but since you are able to vary the frequency at the VFD, you can fine tune the final RPM at the knifes. The slower your blades rotate, the more torque is available to them through the gearbox. You can find many motor RPM/torque calculators online if you are interested.
Bolting it all together requires a sturdy frame, given the amounts of torque involved. Plywood and 2x4s are certainly not going to cut it. I managed to source a fairly sturdy 3HP Taiwanese treadmill locally, which someone was throwing out. It was not functioning electrically (partial circuit board failure), though the DC motors were perfectly fine for another project. The metal frame itself, when cut and welded shut permanently into a vertical storage position, made a perfect platform to build the shredder on.
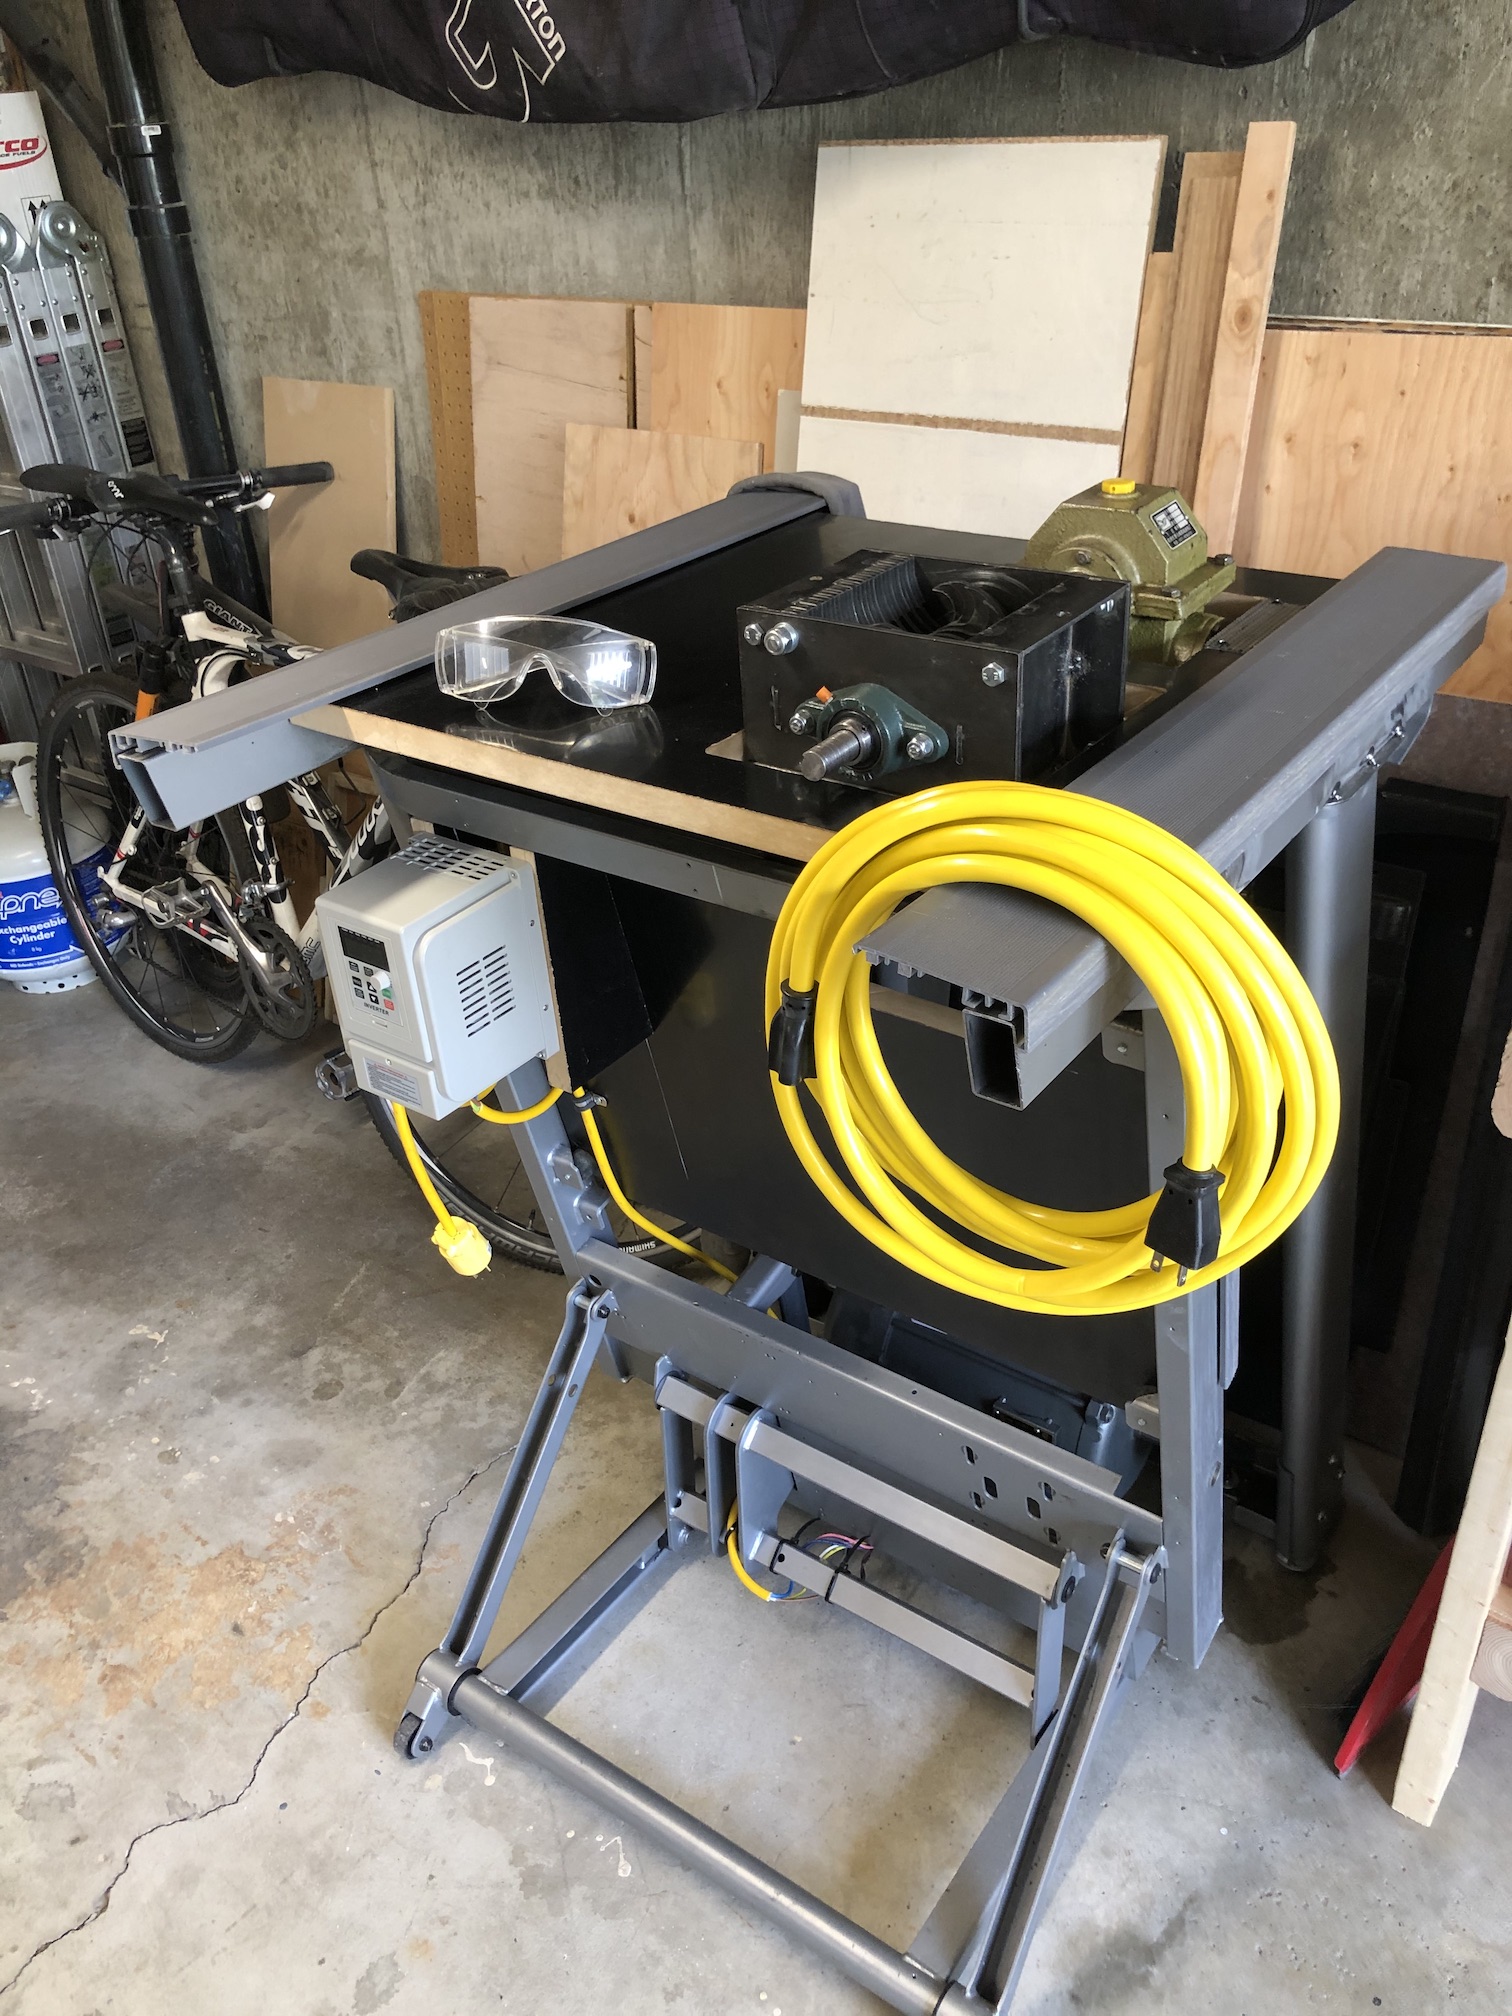
I used steel angle to make a motor mount at the bottom as well as smaller angle to reinforce the frame at the top and make my gearbox and knife box mounts. I used a #40 roller chain and appropriate sprockets to transfer power from the motor to the input shaft on the gearbox. Note, by varying your sprocket sizes, you can also vary the RPM on the gearbox input shaft. Here's my original motor/gear transmission order for reference:
* TSUBAKI H40B15F X 7/8 Part #: 40B15FP BDI #: 916340
* TSUBAKI H40B19F X 1-1/8 Part #: 40B19F-1B BDI #: 916366
* TSUBAKI RS40-1-CL Part #: 40CL BDI #: 1405749
* TSUBAKI 40 RIV 10FT Part #: 40RB BDI #: 17166647
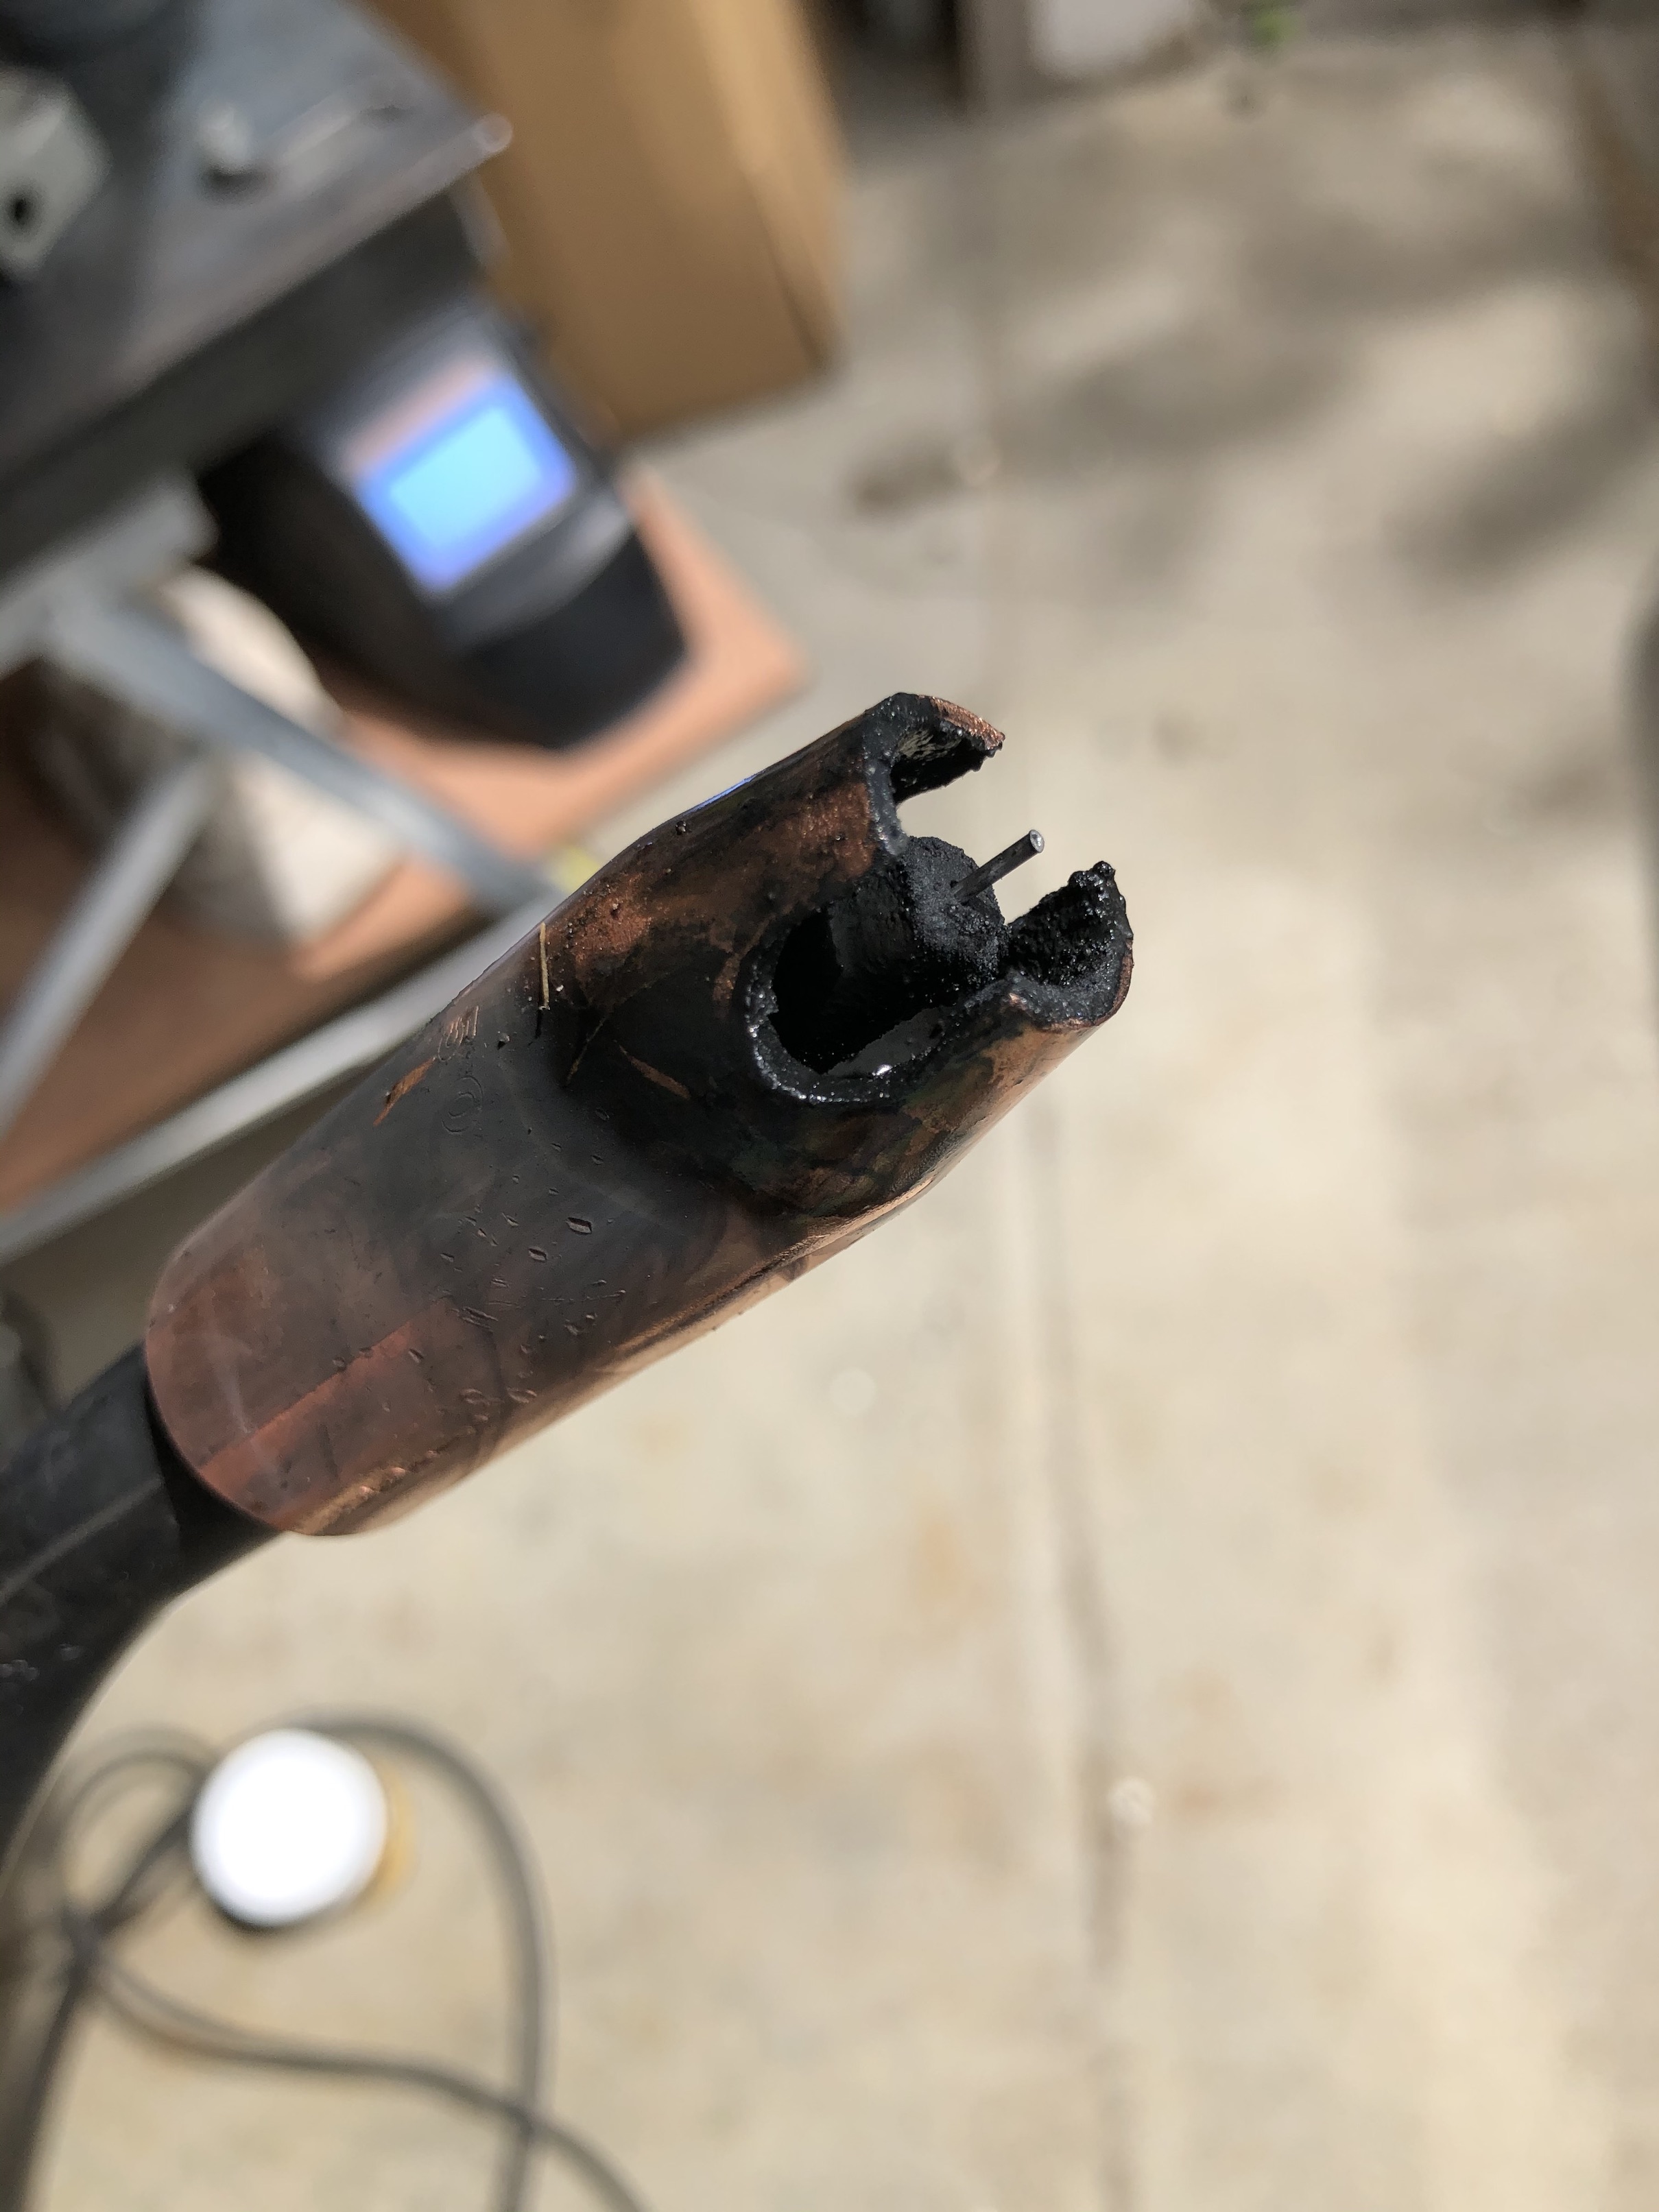
To couple the gearbox output shaft to the knife box, I've used a jaw coupling with a urethane spider:
* LOVEJOY L095 20MM 6X2.8MM KW Part #: 68514441467 BDI #: 1403127
* LOVEJOY L095 24MM 8X3.3MM KW Part #: 68514441327 BDI #: 595176
* LOVEJOY L/AL090/095 SPIDER URETHANE OCT 7/8 Part #: 68514411075 BDI #: 592630
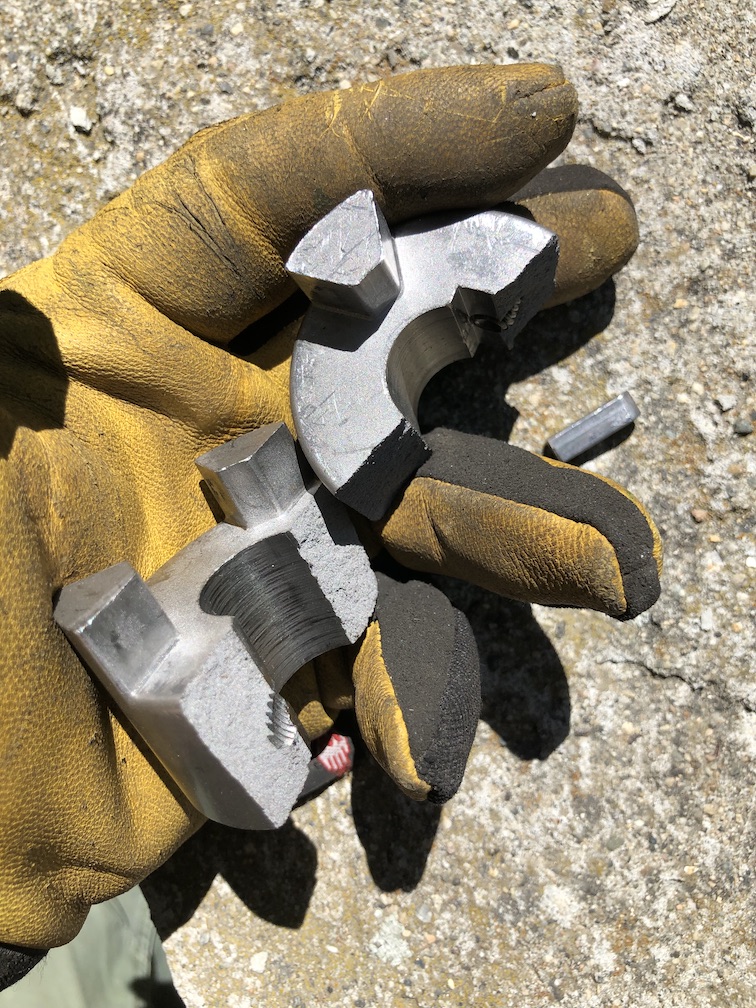
The above 95mm coupling is rated to about 260nM of torque, so pay attention to the limits, since I've certainly already blown one of mine going through a thick part of PETE milk bottle. Maybe the bottle was reinforced, I don't know for sure. If in doubt, you can go one size up, keeping in mind the weakest part of the system will still fail under overload (i.e. you really don't want to bend the shaft).
If you are still reading by this point, you would have probably realised this is not a light DIY project. I also came to this realisation, albeit fairly advanced into into it. In any case, I learned a lot about power transmission, a bit of theory on electrical motors and general mechanical engineering (I am not a mechanical engineer). So, overall, a good personal development experience.
A note on the frame/feeding/exit mechanisms. The original plans for the feeding hopper called for 1mm sheet steel (I got some galvanised offcuts from my metal dealer). That seems to be the most straight forward approach, you'll just need to hammer/bend them into shape and pop-rivet or spot-weld together. Turns out spot welding with a MIG is pretty easy with an appropriate nozzle. I got a two-pack of gas nozzles and cut a channel in one of them.
You'll also probably need a pair of spot (plug) welding pliers, though they only work around outside edges of the material being welded. So I ended up with four plug welds on the hopper, plus pop-rivets on the remaining joints.
For the exit chute, I just hammered the same galvanised sheet into an appropriate shape and fixed it to the bottom of the shredder. Depending on your frame design, all of these decisions will come about naturally, as you visualise the plastic cruft falling through the sieve into whatever receptacle you are going to be using.
Here is a video walkaround of a partically assembled machine.
Finally, now that the original treadmill has been canibalised into a Precious Plastic shredder, here is a video of it eating through its original 3mm ABS plastic panels.
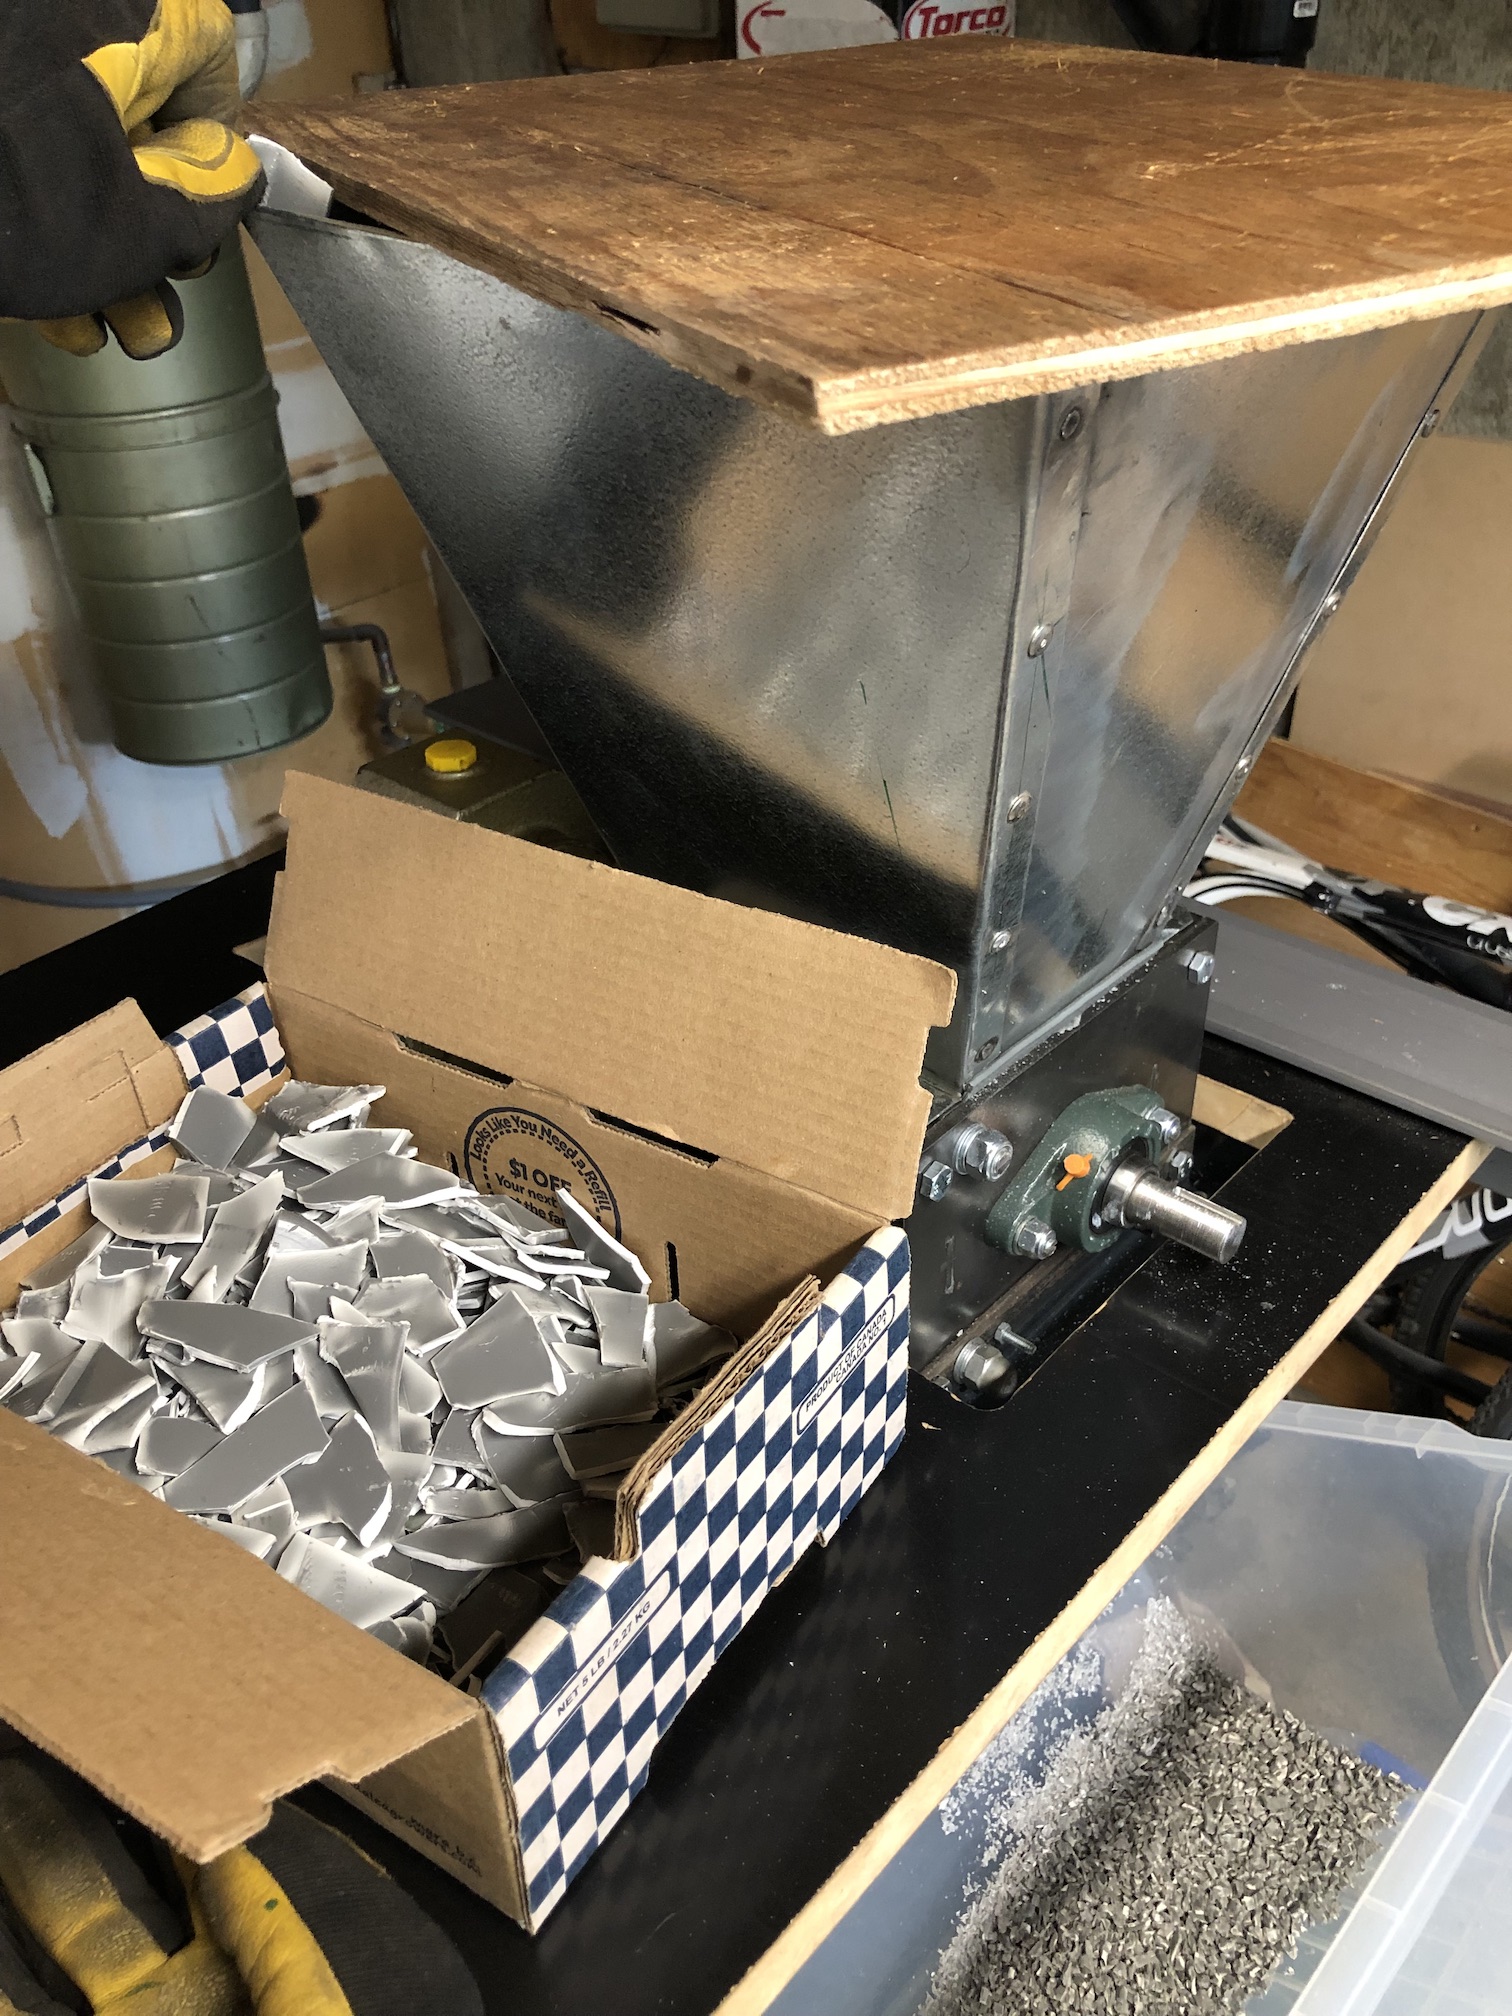
The thickness of these panels is probably the upper limit for this size machine, but if you chip/saw/tear/cut them into small enough pieces of approximately one sq/inch and not feed them in too quicky, it should be able to work through them without too many stop/start/reverses. I found that with my motor/gearbox/sprocket/chain config, frequency of around 25Hz was a good speed to shred this thick plastic.
Next... a machine to turn all this shredded plastic into usable filament.
👊😬👍
